Replacing Concrete Patio: 7 Powerful Reasons to Upgrade in 2025
The Real Cost of Cracked Concrete: Why Replacement Makes Sense
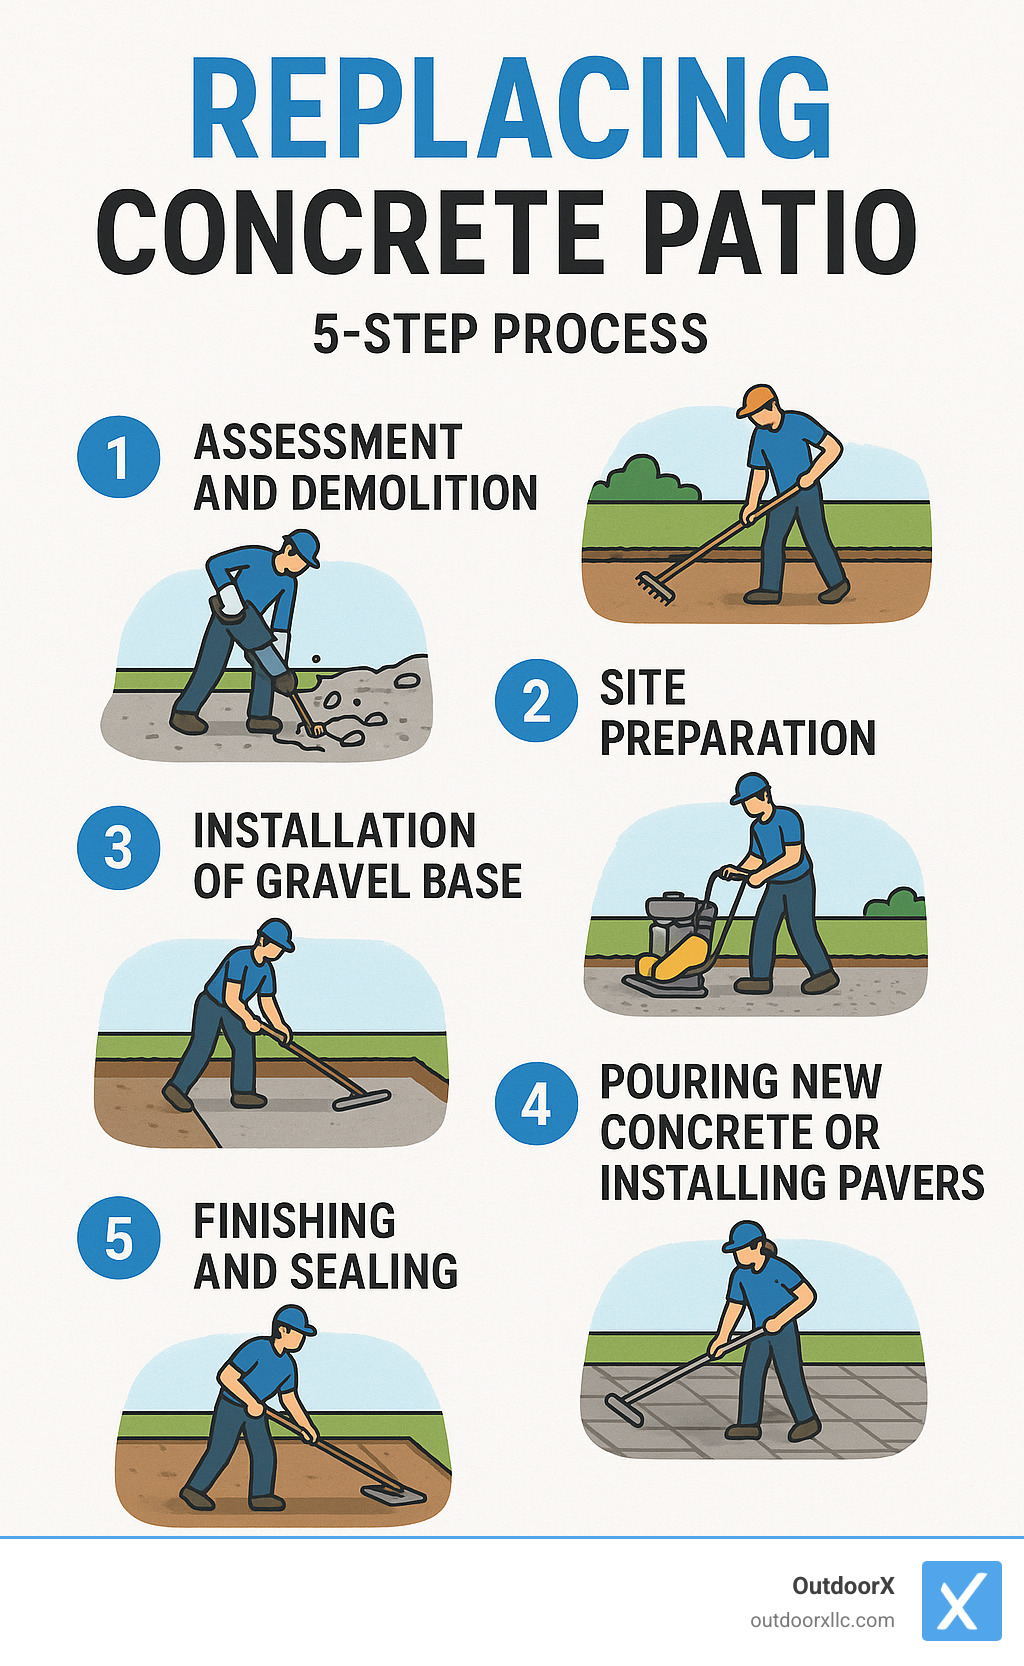
Replacing concrete patio surfaces has become a necessity for many homeowners dealing with cracked, uneven, or deteriorating outdoor spaces. If you’re searching for quick guidance on this project, here’s what you need to know:
When to Replace Your Concrete Patio:
– Large cracks wider than 1/8 inch that suggest structural issues
– Significant settling or uneven surfaces creating trip hazards
– Extensive surface spalling (flaking or pitting)
– Water pooling or drainage toward your house
– Patio age exceeding 15-30 years with multiple repair attempts
According to 2025 data, concrete patio replacement typically costs:
| Project Size | Average Cost Range |
|————–|——————-|
| 100-200 sq ft | $3,000-$6,000 |
| 300-500 sq ft | $9,000-$16,000 |
| 600-800 sq ft | $18,000-$24,000 |
Note: These are average costs based on internet data and not actual costs for OutdoorX LLC.
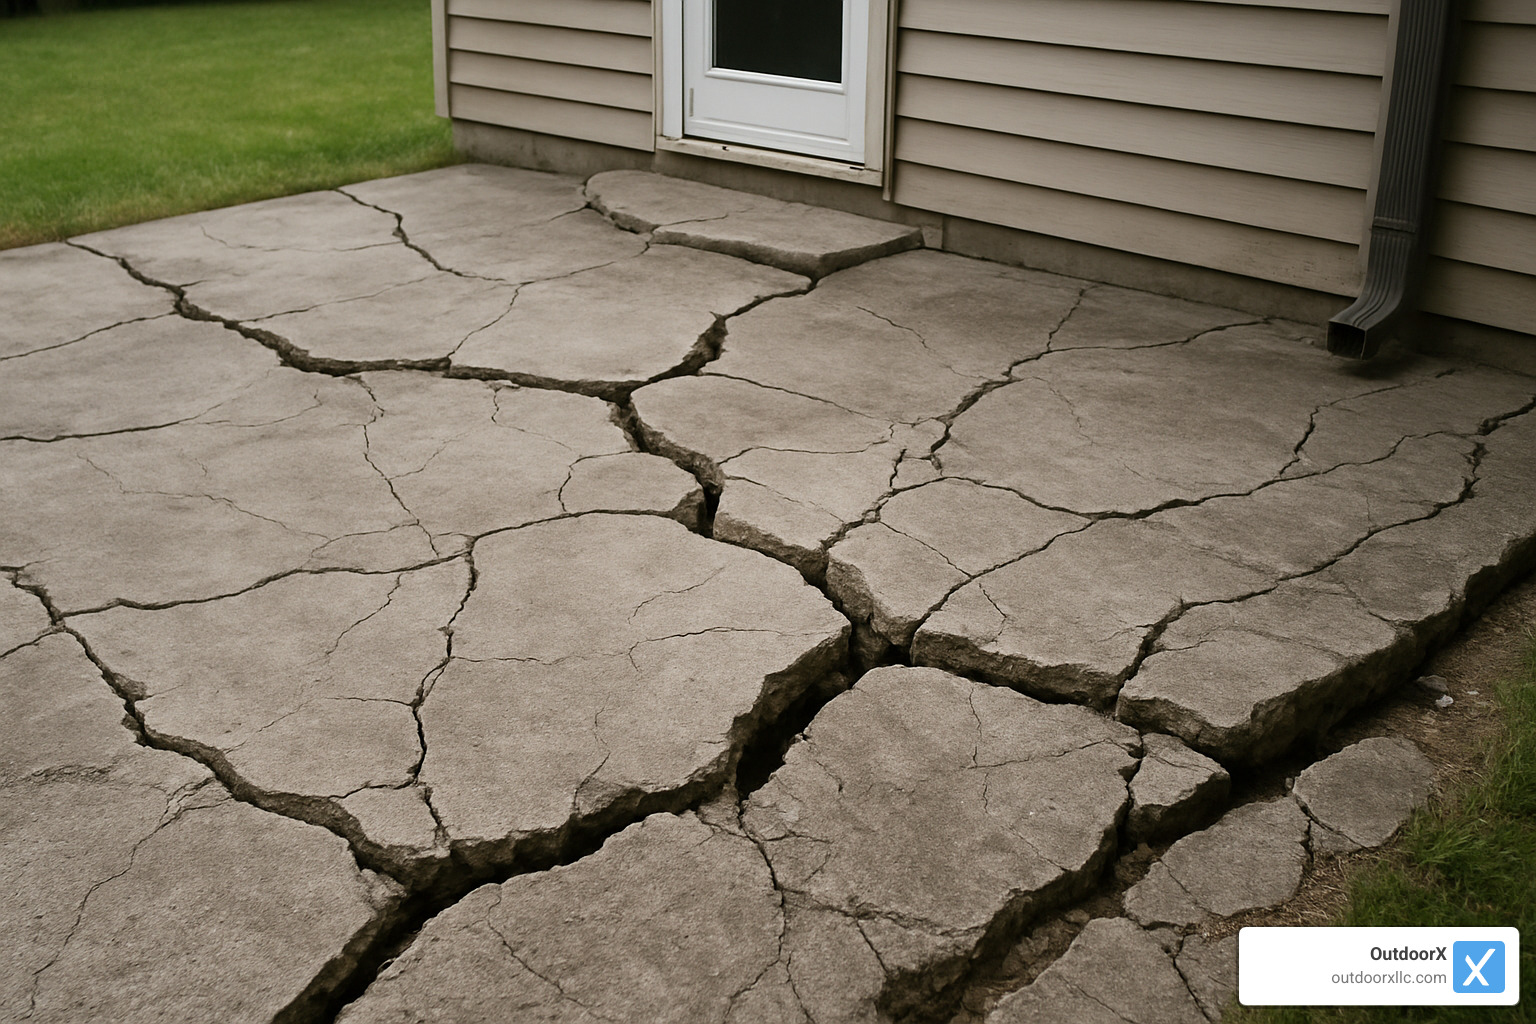
Your backyard concrete patio should be an inviting outdoor retreat—a place for relaxation, entertainment, and connection with nature. But when that once-smooth surface becomes a cracked, uneven hazard that collects water or stains your clothes (and even the family cat, as one homeowner reported), it’s time to consider a fresh start.
“Concrete cracks, it’s not a very pretty product, and there are a lot of better solutions on the market,” says industry expert Micah Dennis. This sentiment reflects what many Essex County homeowners find after years of patching and repairing deteriorating patios.
While resurfacing might seem appealing for its lower upfront cost, it’s often just a temporary fix. When deep cracks, significant settling, or extensive surface damage appears, replacing concrete patio surfaces completely offers the most durable and satisfying long-term solution.
The good news? A patio replacement project can typically be completed in 3-7 days, changing your outdoor living space from a crumbling eyesore to a functional, beautiful extension of your home.
When Is Replacing Concrete Patio the Smart Move?
Ever stared at those cracks in your patio and wondered, “Can I just patch this up, or is it time to start fresh?” You’re not alone. After seeing hundreds of patios across Essex County, we’ve learned when to save and when to replace.
Most concrete patios should last about 30 years in perfect conditions. But let’s be honest—New England weather is far from perfect! Those freeze-thaw cycles, heavy spring rains, and temperature swings can cut that lifespan nearly in half. If your patio is pushing 15 years old and showing multiple issues, replacement often makes better financial sense than continuing the repair cycle.
Here’s how to know when it’s time to say goodbye to that old slab:
Deep, wide cracks tell a story of structural problems. When cracks exceed 1/8 inch in width and run deep into the concrete, they’re usually beyond effective patching. According to the Concrete Network guide, these cracks often indicate serious underlying issues.
Significant settling or heaving creates those annoying uneven surfaces where water pools and people trip. This happens when the soil beneath your patio isn’t stable anymore—and no amount of surface fixes will solve the root problem.
Extensive spalling (that flaky, pitted surface) means your concrete is deteriorating from within. When large areas start crumbling, the damage has typically penetrated throughout the slab.
Tree root damage is persistent and powerful. Those roots that lifted your patio won’t stop growing just because you patched the crack—they’ll keep pushing upward until addressed properly.
Drainage issues toward your house can silently damage your foundation. A properly installed patio should always slope away from your home at about ¼ inch per foot.
While resurfacing might seem cheaper at $3-$5 per square foot, it’s only effective for surface-level problems. With structural issues, you’ll end up paying for the same repairs repeatedly—often exceeding replacement costs over time.
Signs your patio can survive without full tear-out
Not every imperfect patio needs complete replacement. Your concrete might be a candidate for simpler solutions if you’re seeing:
Hairline cracks less than 1/8 inch wide that don’t extend deep into the slab can often be sealed effectively. These superficial cracks may look concerning but don’t typically compromise structural integrity.
Surface staining from leaves, rust, or other environmental factors can usually be addressed with pressure washing and specialized cleaners rather than replacement.
Minor chipping along edges or corners might be unsightly but doesn’t necessarily indicate deeper problems. These areas can often be repaired with patching compounds.
Surface-level issues can typically be addressed through cleaning, crack sealing, or applying a decorative overlay—saving you the expense and disruption of a full replacement.
Red-flag damage demanding replacing concrete patio
Some conditions make replacing concrete patio surfaces the only sensible option:
Wide fractures create uneven surfaces and allow water to penetrate beneath your slab, where it can freeze and cause even more damage. These cracks will continue to grow despite your best repair efforts.
Frost heave occurs when freezing ground pushes sections of your patio upward, creating dramatic height differences between sections. This winter damage signals serious underlying issues.
Trip hazards from uneven settling aren’t just eyesores—they’re safety liabilities. When your patio has multiple areas where people could stumble, it’s time for a fresh start.
Drainage toward your house is something we take very seriously. Water consistently flowing toward your foundation can cause thousands in structural damage to your home.
“I tell homeowners to think of concrete patios like teeth,” says our lead hardscape designer. “Small issues can be filled, but once the damage reaches a certain point, extraction and replacement becomes the only permanent solution. These problems typically indicate issues with the base or soil that will continue causing damage unless properly addressed during replacement.”
When your patio shows these serious signs, investing in proper replacement with improved drainage and a properly prepared base will save you money and headaches in the long run. The Hardscaping expertise we bring ensures your new patio won’t suffer the same fate as your old one.
Permits, Tools & Safe Site Prep
Let’s face it – replacing your concrete patio isn’t quite as simple as grabbing a sledgehammer and going to town on that cracked slab. Before you start breaking things (however satisfying that might be), there’s some important groundwork to cover.
Permits and Regulations
Most Essex County towns require permits when you’re replacing concrete patio surfaces, especially if you’re changing the size or affecting drainage patterns. Even a simple like-for-like replacement might need official approval, so it’s always worth a quick call to your local building department.
Before you do anything else, call Dig Safe at 811 at least 72 hours before your planned demolition day. This free service marks all underground utilities so you don’t accidentally turn your patio project into an unexpected plumbing or electrical emergency! It’s not just a good idea – it’s actually required by law in Massachusetts.
Don’t forget to check your town’s zoning setbacks (typically 5-15 feet from property lines), impervious surface limits (especially important if you’re expanding your patio), and any special historic district requirements that might apply in places like Salem or Newburyport. A little research upfront prevents headaches later.
DIY gear checklist for replacing concrete patio
If you’re brave enough to tackle this project yourself, you’ll need the right tools for the job. For demolishing a typical 10×10 concrete patio, your equipment needs will depend on the thickness and condition of your existing slab.
For breaking up the concrete, an electric jackhammer (40-60 pound class) is your best friend when dealing with slabs thicker than 4 inches. For thinner patios, a good old-fashioned sledgehammer might do the trick. You’ll also want a rotary hammer with chisel attachments for more precise work and a heavy-duty pry bar for lifting those broken chunks.
Don’t forget about safety! Replacing concrete patio surfaces creates dust, noise, and flying debris. At minimum, you’ll need safety glasses, ear protection, a dust mask or respirator, steel-toed boots, and work gloves that can handle rough concrete edges.
For material handling, a sturdy wheelbarrow is essential, along with bolt cutters if you encounter any reinforcing wire or rebar. For the preparation phase, gather a shovel, pick, tape measure, marking paint, string line, stakes, a 4-foot level, and a plate compactor for proper base preparation.
Many of our Essex County clients find that renting specialized equipment makes more sense than buying. A jackhammer rental runs about $70-100 per day – much more economical than purchasing one for a one-time project.
Budget factors & average costs (2025 data)
Understanding the true costs of replacing concrete patio surfaces helps you plan your project realistically. Based on current 2025 data, here’s what you can expect to pay:
The demolition phase costs include equipment rental ($100-$300 per day if DIY), professional demolition services ($4-$6 per square foot), concrete disposal fees ($100-$500 depending on volume), and dumpster rental ($300-$700 for a 10-20 yard container).
For the new installation, standard concrete slabs run about $9-$12 per square foot, while stamped or decorative concrete jumps to $15-$30 per square foot. If you’re considering concrete pavers, budget $12-$40 per square foot, and natural stone typically costs $20-$50 per square foot.
That coastal towns like Gloucester and Rockport tend to run 10-15% higher than inland areas due to higher labor rates and delivery charges. Your specific costs will also vary based on site accessibility (narrow access points require smaller equipment and more labor), soil conditions (rocky soil needs more excavation work), drainage solutions needed, and any existing obstacles like tree roots or buried debris.
Note: These figures represent average costs based on internet data and industry sources, not actual costs for OutdoorX LLC services. Your specific project may vary based on site conditions, material selections, and design complexity.

Tear-Out Tactics: Removing the Old Slab
The demolition phase is arguably the most physically demanding part of replacing concrete patio surfaces. With proper planning and technique, however, you can make this process safer and more efficient.
Step-by-step demolition day plan
- Prepare the site
- Remove all furniture, planters, and decorative elements
- Cover nearby windows with plywood to prevent accidental damage
- Hang canvas drop cloths (not plastic) to contain debris
- Wet the concrete slightly to minimize dust
- Set up a clear path for debris removal to your dumpster or truck
- Break strategically
- Begin at an edge or existing crack where the concrete is already compromised
- For larger patios, consider having a professional saw-cut the slab into manageable sections (approximately 3×3 feet) before breaking
- Work in a systematic pattern, breaking concrete into pieces that you can lift safely (typically 40-60 pounds)
- If the patio is adjacent to your house foundation, work away from the house to prevent damage
- Manage debris efficiently
- Clear broken pieces as you go rather than creating a large pile
- Sort materials if you plan to recycle or repurpose any concrete
- Be mindful of weight limits for wheelbarrows and dumpsters
- Take regular breaks to prevent fatigue-related injuries
- Address the subbase
- Once concrete is removed, inspect the underlying soil and gravel
- Note any areas of poor drainage or soil instability
- Remove any rotted wood separators or deteriorated expansion joint material
- Mark areas where additional excavation will be needed for the new base
Most concrete patios in Essex County are 4 inches thick, though older patios may be thinner (3 inches) and those designed for heavier loads might be 5-6 inches thick. Thickness affects both demolition difficulty and disposal volume.
Pro tip: If you encounter reinforcing mesh or rebar, don’t try to pull the concrete up in large sheets. Instead, break the concrete around the reinforcement first, then cut the metal with bolt cutters or an angle grinder fitted with a metal-cutting wheel.
Concrete disposal & eco-friendly reuse
Disposing of old concrete responsibly is an important consideration. A typical 10×10 patio generates approximately 1.5-2 tons of concrete waste. Here are your options:
1. Recycling centers
Several concrete recycling facilities operate in Essex County, including locations in Peabody, Salem, and Gloucester. These facilities crush old concrete for reuse as aggregate in new construction projects, typically charging $20-$50 per ton—significantly less than landfill disposal fees.
2. Repurposed rubble
Consider creative reuse options for your old concrete:
* Broken concrete pieces (sometimes called “urbanite”) can be used to create retaining walls or raised garden beds
* Crushed concrete makes excellent drainage material for French drains
* Larger flat pieces can be repurposed as stepping stones in garden paths
3. Dumpster rental
For most homeowners, renting a dumpster is the most convenient option. A 10-yard dumpster typically accommodates a 10×10 patio demolition. When selecting a dumpster service, ask specifically about concrete disposal, as some companies have weight restrictions or separate pricing for heavy materials.
4. Permeable base material
If you’re installing a new paver patio, consider using your crushed old concrete as part of the base material. This approach reduces disposal costs and promotes better drainage. However, the concrete must be properly crushed to uniform size (typically ¾ inch) and free of contaminants.
“Concrete recycling not only reduces landfill waste but can save homeowners 15-30% on disposal costs,” notes our sustainability coordinator at OutdoorX. “We prioritize responsible material management in all our Essex County projects.”
Choosing Your New Surface: Materials, Looks & Budgets
After tearing out that old, cracked concrete, you’re standing at a crossroads of possibility. This is the fun part—reimagining your outdoor space with materials that not only look beautiful but will stand up to whatever New England weather throws at them.
When our OutdoorX design team sits down with Essex County homeowners, we explore several key factors before recommending materials:
First, we consider our unique coastal climate. Materials need to withstand those brutal freeze-thaw cycles that crack lesser patios, plus salt exposure for homes closer to the coast in Gloucester or Marblehead. Your home’s architectural style matters too—a sleek modern patio might look out of place against a colonial in Ipswich, while traditional pavers might not complement your contemporary Andover home.
How you’ll use the space guides our recommendations as well. A cooking and dining area needs different considerations than a lounge space or play area. And let’s be honest about maintenance—some gorgeous materials require more TLC than others. We’ll help you find the sweet spot between beauty and practicality.
Here’s a comparison of popular options for replacing concrete patio surfaces:
| Material | Cost Range (per sq ft) | Lifespan | Pros | Cons |
|---|---|---|---|---|
| Poured Concrete | $9-$30 | 25-30 years | Versatile, smooth surface for furniture, many decorative options | Can crack over time, repairs often visible, impermeable |
| Concrete Pavers | $12-$40 | 30-50 years | Easy repairs, numerous patterns, permeable options available | Higher initial cost, may require periodic joint sand replenishment |
| Natural Stone | $20-$75 | 50+ years | Timeless beauty, unique character, extremely durable | Most expensive option, limited color palette, challenging installation |
| Porcelain Pavers | $18-$45 | 30+ years | Stain-resistant, consistent color, low maintenance | Relatively new product, requires precise installation, limited thickness options |
| Hybrid (concrete with permeable sections) | $15-$45 | 25-40 years | Eco-friendly drainage, visual interest, reduced runoff | More complex installation, limited furniture placement options |
Note: These are average costs based on internet data and not actual costs for OutdoorX LLC.
Poured concrete finishes
Modern concrete has come a long way from the plain gray slab you’re replacing. Today’s options offer remarkable versatility:
A simple broom finish ($9-$15/sq ft) provides an economical, non-slip surface that can be improved with integral color or decorative borders. It’s clean, classic, and budget-friendly.
For more drama, stamped concrete ($15-$30/sq ft) can mimic the look of natural stone, brick, or even wood planks at a lower price point than the real materials. We’ve installed stamped patios that guests swear are made from bluestone until they touch the surface!
Stained concrete ($12-$25/sq ft) creates gorgeous, variegated color effects that can transform plain concrete into something resembling natural stone or even leather. One North Reading client told us her stained concrete patio “looks like art underfoot.”
Exposed aggregate ($12-$20/sq ft) offers excellent slip resistance with a distinctive textural appearance that shows off decorative stones within the concrete mix. It’s particularly striking with locally-sourced stone aggregate that ties into the regional landscape.
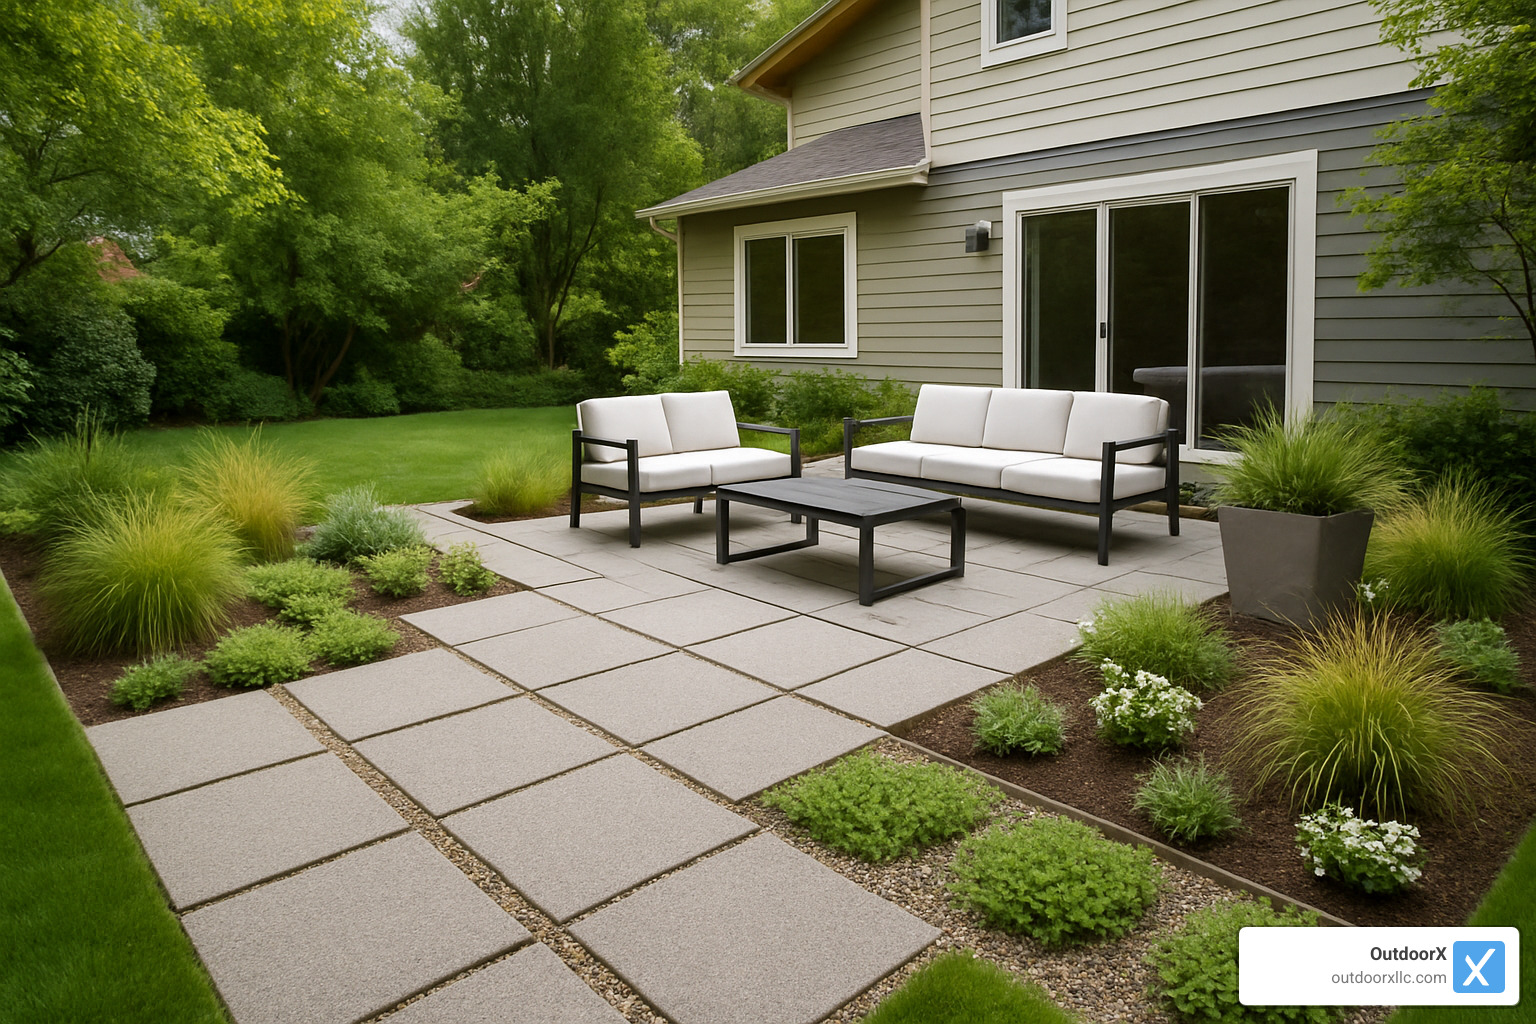
Interlocking pavers & modular systems
Concrete pavers have become the go-to choice for many Essex County homeowners replacing concrete patio surfaces, and for good reason. Their segmental nature brings numerous advantages:
The design flexibility is best—from traditional herringbone patterns that offer excellent structural integrity to random ashlar layouts that mimic natural stone. Color options range from subtle earth tones to vibrant blends that create visual interest.
Repairability is perhaps the biggest advantage. Should damage occur or access to utilities beneath be needed, individual pavers can be removed and replaced without disturbing the entire surface—something impossible with poured concrete.
Many of our clients are choosing permeable paver options that allow rainwater to infiltrate rather than run off. These systems are particularly valuable in coastal towns like Beverly and Swampscott, where stormwater management is increasingly regulated.
Modern pavers also offer excellent color stability, with manufacturers providing warranties against fading that poured concrete simply can’t match. While professional installation is recommended for most paver projects, their modular nature makes them more DIY-friendly than poured concrete for the ambitious homeowner.
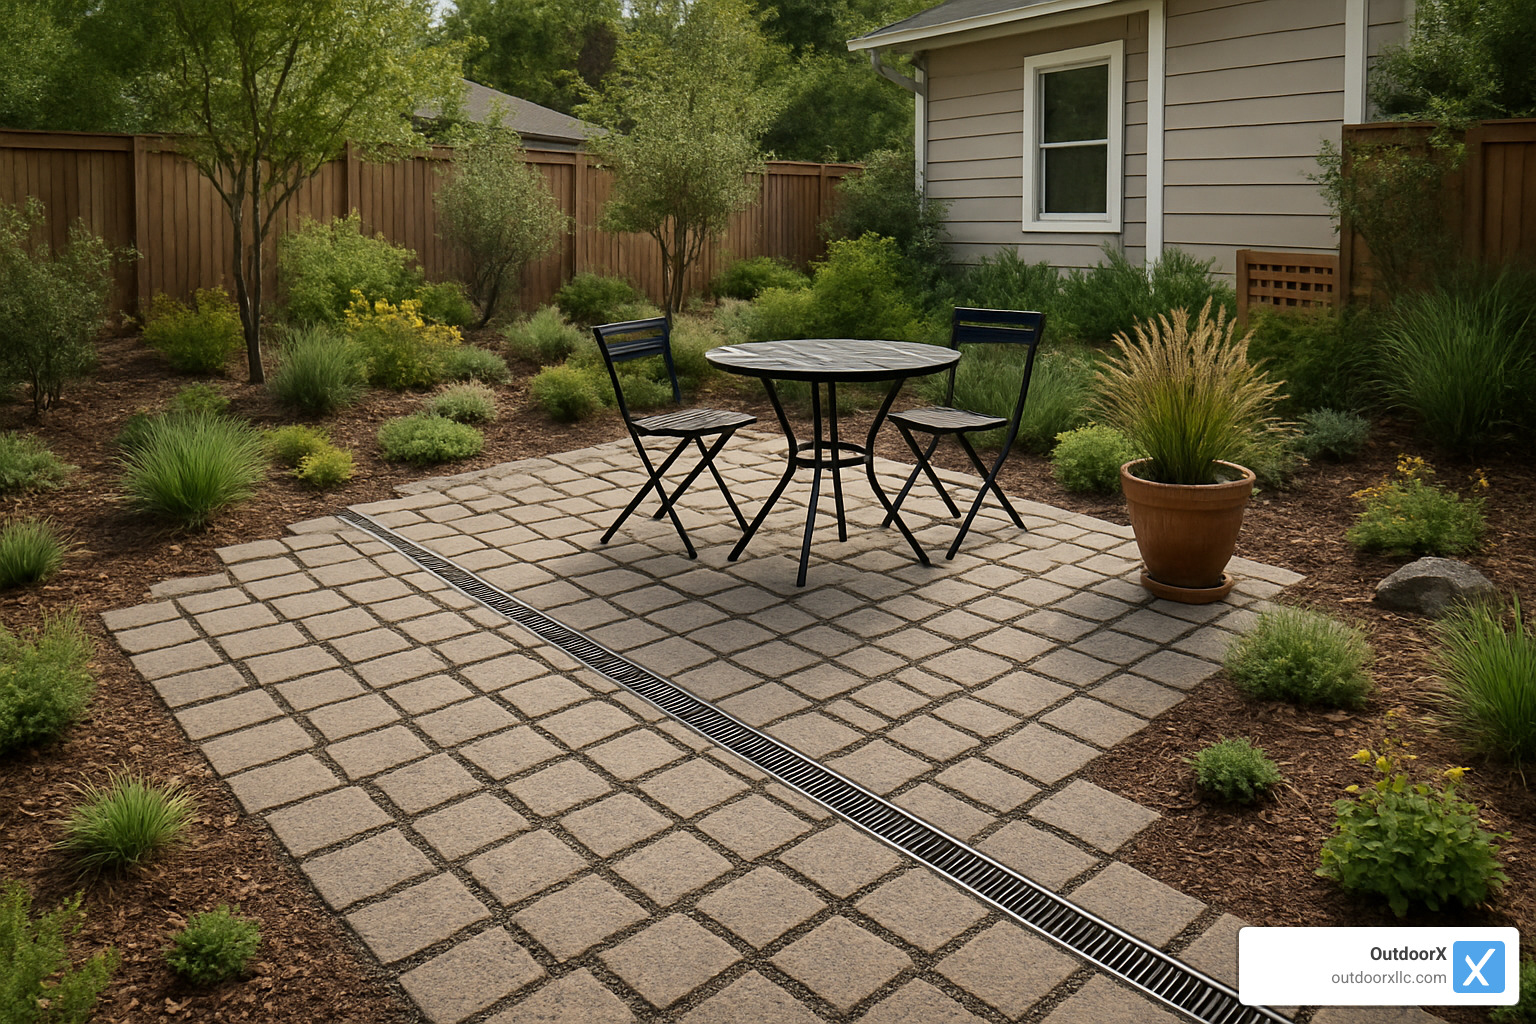
Green & hybrid options replacing concrete patio
For environmentally conscious homeowners, several innovative options blend hardscaping with green elements:
Permeable paver systems feature wider joints filled with small aggregate rather than sand, allowing water to percolate through to a specially prepared base. These systems effectively manage rainwater while providing a solid surface for furniture and foot traffic.
Grid pavers with turf allow grass to grow through openings in concrete or plastic grid systems. One Boxford family told us their turf grid patio “stays noticeably cooler in summer” than their previous concrete slab, making barefoot walking more comfortable.
Hybrid designs incorporate planted areas within the patio layout, creating visual interest while reducing impervious surface area. We’ve designed numerous patios with inset planting beds, stepping stone paths through ground cover, or patio sections separated by strips of grass or low-growing perennials.
For the environmentally conscious, several manufacturers now offer pavers made with recycled content—including recycled glass, crushed porcelain, or reclaimed concrete aggregate. These products reduce virgin material use while providing distinctive appearance options.
The perfect patio material balances aesthetics, durability, maintenance needs, and budget. Whether you’re drawn to the endless design possibilities of pavers, the seamless look of decorative concrete, or the sustainable appeal of a hybrid approach, our OutdoorX team can help you steer these choices to create an outdoor space that will serve your family beautifully for decades to come.
Installing the New Patio: Base to Final Seal
The secret to a patio that stands the test of time isn’t in what catches the eye—it’s in what lies beneath the surface. After replacing concrete patio surfaces for hundreds of Essex County homeowners, we’ve learned that proper foundation work is non-negotiable, especially in New England where our freeze-thaw cycles can wreak havoc on poorly installed hardscaping.
Step 1–3: Layout, excavation, base
The journey to your new outdoor living space begins with careful planning and precise groundwork.
When we mark out a new patio, we use white marking paint to create clear outlines (other colors are reserved for utility companies). Setting up proper drainage slope is critical—we aim for at least ¼” per foot, always directing water away from your home’s foundation. Many of the failing patios we’ve replaced in Beverly and Danvers suffered from improper slope that sent water toward the house.
“I always tell homeowners to take plenty of photos before we start digging,” says our lead installer. “Once excavation begins, it’s helpful to remember exactly where everything was planned.”
Excavation depth varies by material choice, but we generally dig down 7-8 inches for concrete, 9-12 inches for pavers, and 10-14 inches for natural stone. These depths might seem excessive, but they allow for adequate base material while maintaining the right finished height relative to your doorways and landscape.
This excavation stage presents the perfect opportunity to solve drainage problems that plagued your old patio. For particularly wet areas in towns like Ipswich or Rowley, we often install French drains along the low side of the patio or add drain inlets connected to underground pipes.
Base preparation is where professional installers truly earn their keep. We begin by rolling out geotextile fabric over the excavated soil—this prevents material mixing and discourages weeds. Then comes the crushed stone base, added and compacted in layers:
For concrete: 4 inches of ¾-inch crushed stone
For pavers: 6-8 inches of ¾-inch crushed stone
For natural stone: 8-10 inches of ¾-inch crushed stone
Each layer gets compacted in 2-inch lifts until firm. Skipping proper compaction is the most common DIY mistake we see, leading to settling and an uneven surface within just a season or two.
“The base is 80% of your patio’s success,” our installation team often reminds clients. “In Essex County’s climate, we typically add an extra inch or two of base material compared to national standards to account for our harsh freeze-thaw cycles and heavy rainfall.”
Step 4–6: Laying surface, edging, finishing
With a solid foundation in place, it’s time to create the surface that will become your outdoor living room.
For concrete patios, we set up sturdy forms using 2x4s or specialized form boards, then install reinforcement (wire mesh or rebar) suspended in the middle of the slab—never resting on the ground. The concrete pour should achieve a minimum 4-inch thickness, carefully screeded level and finished according to your design choice. Control joints get cut at strategic intervals (typically every 8-10 feet) to direct inevitable cracking to predetermined, barely noticeable lines.
Paver installations begin with a carefully screeded 1-inch layer of bedding sand. We start laying pavers from a fixed edge or square corner, using string lines to maintain perfect alignment. The change is remarkable—what begins as an excavated pit becomes a precise pattern of interlocking stones. After all pavers are placed, we compact the surface with a plate compactor fitted with a rubber pad, then sweep in polymeric sand that hardens to lock everything in place.
Natural stone patios require a modified mortar bed or specialized setting materials to accommodate variations in stone thickness. Each stone gets carefully placed with consistent joint spacing, checked for level as we go. The organic beauty of natural stone comes with installation challenges that demand experience and patience.
Edge restraints are critical for maintaining your patio’s integrity over time. For concrete, the forms are removed after curing. Paver patios need plastic, aluminum, or concrete edge restraints secured with spikes, while natural stone typically uses a concrete curb or mortared stone border.
The finishing touch for most patios is proper sealing. Concrete should cure for 28 days before sealing, while pavers can be sealed after polymeric sand has set (typically 24 hours). Some natural stones benefit from sealing, while others are best left in their natural state.
Preventing future cracks after replacing concrete patio
When we replace cracked concrete patios in towns like North Andover or Boxford, we’re determined to ensure the new surface doesn’t suffer the same fate. Here’s how we prevent future problems:
Proper subgrade preparation is essential—we remove all organic material and unsuitable soils before addressing any drainage issues at the subgrade level. Thorough compaction of the native soil creates a solid foundation for everything that follows.
Base depth and compaction techniques vary by location. Properties near the coast in Manchester-by-the-Sea need different approaches than those inland in Topsfield. We always use sufficient base material for our New England climate and compact in thin layers rather than attempting to compact thick layers at once.
For concrete patios, strategic control joints and expansion accommodation prevent random cracking. We install control joints at appropriate intervals (8-10 feet maximum) and cut them to a depth of ¼ the slab thickness. Isolation joints where the patio meets your home’s foundation allow for natural movement without stress cracking.
The concrete mix itself matters tremendously. We use concrete with appropriate strength (minimum 3500 PSI for outdoor applications) and include air entrainment additives for freeze-thaw resistance. Proper curing—keeping the concrete moist for 5-7 days—develops full strength and durability.
Finally, we educate homeowners on maintenance practices that extend patio life: sealing concrete or pavers every 2-3 years, addressing small cracks promptly before they expand, and maintaining proper drainage away from the patio.
At OutdoorX, we’ve refined these techniques through years of installing patios throughout Essex County’s diverse soil conditions and microclimates, from the sandy soils of coastal Gloucester to the clay-heavy areas of North Andover. The result? Beautiful outdoor spaces that stand up to New England’s challenging conditions for decades, not just years.
Care, Maintenance & Sustainable Upgrades
Your newly installed patio isn’t just a beautiful addition to your home—it’s a significant investment that deserves proper care. With the right maintenance approach, your outdoor space will continue to be a source of enjoyment and pride for decades to come.
The good news? Maintaining your new patio is relatively simple when you follow a seasonal rhythm. Most Essex County homeowners find that cleaning and resealing every 2-3 years keeps their patios looking fresh and protected against our challenging New England weather. This regular attention prevents small issues from becoming costly problems down the road.
“I tell my clients to think of patio maintenance like changing the oil in your car,” says our OutdoorX maintenance specialist. “It’s not glamorous, but it prevents expensive repairs later on.”
Our team has found that spring and fall are ideal times for thorough patio inspections. After winter’s freeze-thaw cycles or summer’s intense use, these transition seasons offer perfect opportunities to address any emerging concerns before they worsen.
When it comes to winter care, one crucial tip for Essex County homeowners: avoid rock salt at all costs. This common de-icer can severely damage concrete and pavers, causing pitting and spalling. Instead, opt for calcium magnesium acetate (CMA) or calcium chloride products that effectively melt ice without harming your beautiful patio surface.
For paver patios, pay special attention to joint sand, which may need replenishment every few years. This simple maintenance step prevents weed growth and keeps pavers firmly in place—particularly important in areas with heavy rainfall or significant temperature fluctuations.
Drainage tune-ups & root barriers
Even the most perfectly installed patio can develop drainage issues over time. Settling soil, landscape changes, or increasingly intense storms can all affect how water moves across and around your outdoor spaces.
If you notice water pooling on your patio after rain, don’t ignore it! Standing water not only creates slip hazards but can also penetrate the surface and cause damage during freeze-thaw cycles. Simple solutions include:
Adding channel drains along the low side of your patio to capture and redirect runoff. These discrete systems can be beautifully integrated into your hardscape design while providing crucial water management.
Installing a French drain around patio edges to capture subsurface water before it reaches your foundation. These systems are particularly valuable for patios that slope toward your home.
Adding a drain to a concrete patio through strategic core drilling can solve persistent puddle problems without requiring complete replacement.
For patios near trees, root barriers are a wise preventive measure. We’ve seen countless Essex County patios damaged by aggressive tree roots seeking water. Modern root barrier systems installed 18-24 inches deep can direct roots downward rather than laterally under your patio. These barriers should extend at least 2 feet beyond the tree’s canopy drip line for maximum effectiveness.
“Root barriers are far less expensive than replacing concrete patio surfaces damaged by tree roots,” our landscape designer points out. “It’s prevention versus cure, and prevention always wins.”
Eco-friendly sealers & low-VOC stains
Traditional concrete sealers often contain high levels of volatile organic compounds (VOCs) that can harm both your family’s health and the environment. Thankfully, eco-friendly alternatives now offer excellent protection without the drawbacks.
Water-based acrylic sealers have become our go-to recommendation for most Essex County patios. These sealers provide robust protection while allowing the concrete to breathe—crucial in our humid coastal climate. Available in matte, satin, and gloss finishes, they offer aesthetic flexibility while maintaining a much lower VOC content than traditional solvent-based products.
For homeowners seeking the most environmentally responsible options, penetrating silane/siloxane sealers offer virtually invisible protection with extremely low VOC content. These products work by penetrating the concrete rather than forming a film on top, creating a water-repellent barrier that can last 4-7 years between applications.
The newest innovations include bio-based sealers derived from renewable resources like vegetable oils and plant resins. While these products may require more frequent application than synthetic alternatives, they offer peace of mind for environmentally conscious homeowners.
For concrete patios in sunny locations, consider cool-paving technologies with reflective finishes. These specialized additives can reduce surface temperatures by 20-30°F, making your patio more comfortable during hot summer days while extending the concrete’s lifespan by reducing thermal stress.
“The sealer you choose affects not just how your patio looks, but how it performs over time,” explains our OutdoorX sustainability coordinator. “In Essex County’s coastal environment, selecting the right product for your specific location and exposure conditions makes all the difference.”
By combining these maintenance practices with sustainable product choices, your new patio will remain beautiful, functional, and environmentally responsible for many years to come—a true extension of your home that improves both your property value and your quality of life.
Frequently Asked Questions about Replacing Concrete Patio
How long does it take to remove and replace a 10×10 patio?
One of the most common questions we hear from Essex County homeowners is about timeline expectations. For a standard 10×10 foot concrete patio (about 100 square feet), here’s what you can realistically expect:
The demolition and removal typically takes a single day of focused work. Your old concrete will be broken up, removed, and hauled away. Following this, site preparation and base installation usually requires 1-2 days, depending on soil conditions and whether drainage issues need correction.
The installation timeline varies by material choice. With poured concrete, the actual pouring takes just one day, but you’ll need to allow about 7 days of curing time before placing heavy furniture or high traffic. Paver installations generally take 1-2 days with the advantage of immediate light use. Natural stone is the most time-intensive at 2-3 days plus curing time for any setting materials.
“Weather is always a factor in New England patio projects,” our scheduling coordinator often reminds clients. “We build in flexibility for Essex County’s unpredictable conditions, especially in coastal towns like Gloucester and Marblehead where weather can change rapidly.”
All told, expect 3-7 active working days for most standard patio replacements, not including curing time or weather delays. More complex designs featuring built-in seating, fire pits, or multi-level surfaces will naturally extend this timeline.
Do I need a permit for patio replacement in most MA towns?
Permit requirements across Essex County vary considerably, which can create confusion for homeowners planning a replacing concrete patio project. Here’s a practical breakdown:
If you’re doing a like-for-like replacement (same size, same location), many towns consider this maintenance and may not require formal permits. However, this isn’t universal – some municipalities still want oversight.
Size increases or relocations almost always trigger permit requirements, especially when they might change drainage patterns or push against lot coverage limits. This is particularly true in environmentally sensitive areas.
The permitting process differs dramatically by location. Historic districts in Salem, Marblehead, Manchester-by-the-Sea, and Newburyport typically have more rigorous review processes, sometimes involving historical commissions. Meanwhile, towns like Danvers, Peabody, and North Andover often offer more streamlined approaches for residential hardscaping.
An important consideration many homeowners overlook: Conservation Commission approval becomes necessary if your patio falls within 100 feet of wetlands or 200 feet of a perennial stream or river – a common situation in towns like Ipswich, Essex, and Rowley.
We always recommend contacting your local building department early in your planning. At OutdoorX, we handle permitting for our clients throughout Essex County, navigating each town’s specific requirements so you don’t have to become an expert in local regulations.
Can I DIY or should I hire a pro for replacing concrete patio?
This question deserves careful consideration based on your specific situation. Replacing concrete patio surfaces can be a DIY project, but success depends on several factors.
DIY might be appropriate if you have experience with similar hardscaping projects and your patio is relatively small (under 100 square feet) with a simple design. You’ll need access to proper equipment, including potentially a jackhammer, compactor, and concrete tools. The patio should be standalone rather than connected to your home’s foundation, and you’ll need to be physically capable of heavy labor over multiple weekends.
Professional installation makes more sense for larger or complex patios, especially those requiring significant drainage corrections. If your project needs heavy equipment operation, faces property access challenges, or includes decorative elements like stamped concrete, the expertise of professionals becomes invaluable. Many homeowners also choose professionals when timeline matters or when they want installation warranty protection.
“The most common DIY patio replacement mistakes we see involve inadequate base preparation and improper drainage planning,” our lead installer often points out. “These errors typically lead to premature failure requiring professional intervention anyway.”
Many of our Essex County clients opt for a practical hybrid approach: handling the demolition themselves (often the most physically demanding but least technically complex part) and then bringing in professionals for the precision work of base preparation and new surface installation.
This approach tends to work particularly well for homeowners in towns like Lynnfield, North Reading, and Georgetown with larger properties where there’s more room to maneuver and fewer space constraints than in densely developed coastal communities.
Whatever approach you choose, proper planning and realistic assessment of your skills and available time will set your project up for success.
Care, Maintenance & Sustainable Upgrades
Maintaining your new patio properly will extend its lifespan and keep it looking beautiful for years to come. Here in Essex County, our unique climate presents specific maintenance challenges, from coastal salt exposure to freeze-thaw cycles.
Regular maintenance schedule:
- Cleaning: Pressure wash concrete or pavers annually (spring is ideal) using appropriate pressure settings and cleaners for your specific material. For natural stone, use gentler cleaning methods as recommended by the manufacturer.
- Sealing: Reapply sealer every 2-3 years for concrete and most pavers. Some natural stones may require specialized sealers or no sealer at all. In coastal areas like Gloucester, Rockport, and Marblehead, more frequent sealing (every 1-2 years) may be necessary due to salt exposure.
- Joint maintenance: For paver patios, check joint sand annually and replenish as needed. Consider polymeric sand for longer-lasting joints, especially in areas with heavy rainfall or near swimming pools.
- Weed control: Address weeds promptly before they become established in joints or cracks. Eco-friendly options include vinegar-based solutions or boiling water for spot treatment.
- Winter care: Use calcium magnesium acetate or calcium chloride ice melt products rather than rock salt, which can damage concrete and pavers. Remove snow with plastic shovels to avoid surface scratching.
Sustainable improvements to consider:
As your patio ages, consider these eco-friendly upgrades:
- Rainwater harvesting: Install rain barrels or cisterns to capture runoff from adjacent roof areas, providing irrigation water for nearby plantings.
- Permeable retrofits: If drainage becomes an issue, consider replacing sections of solid patio with permeable pavers or gravel bands to improve infiltration.
- LED lighting: Upgrade to energy-efficient LED fixtures that consume up to 80% less electricity than traditional outdoor lighting.
- Native plant integration: Add containers with native plants around your patio perimeter to support local pollinators and reduce water needs.
- Solar features: Consider solar-powered lighting, water features, or even heating elements for extended seasonal use of your outdoor space.
“Sustainable hardscaping isn’t just about installation—it’s about long-term stewardship,” explains our design team at OutdoorX. “We encourage our Essex County clients to think about their patio as a living system that interacts with the surrounding landscape.”
Conclusion
Replacing concrete patio surfaces is far more than just a repair project—it’s a golden opportunity to completely reimagine your outdoor living space while boosting your home’s value. Throughout Essex County, we’ve seen families transform cracked, uneven patios into stunning outdoor retreats that become the heart of their home’s exterior.
From the salt-sprayed coastal properties of Gloucester and Marblehead to the more sheltered inland settings of North Andover and Topsfield, each patio replacement brings its own unique challenges and rewards. What unites these projects is how they improve daily life, creating spaces where memories are made and outdoor living truly comes alive.
If you’ve been putting off dealing with that eyesore of a patio, breaking the project into manageable steps makes it far less intimidating. Whether you’re leaning toward the DIY approach or planning to work with professionals, success comes down to three key elements: thoughtful planning, quality materials, and meticulous installation techniques.
At OutdoorX, we’ve developed our expertise specifically around Essex County’s unique conditions. Our team understands the local soil types, drainage challenges, and climate considerations that impact how a patio performs over time. This regional knowledge ensures that your new patio won’t just look beautiful on installation day—it will maintain its integrity and appearance through countless New England winters, spring thaws, and summer gatherings.
The change possibilities are virtually endless. Perhaps you’re considering a simple concrete replacement with decorative stamping for added character. Or maybe you’re dreaming of an elaborate outdoor living area with multi-colored pavers, natural stone accents, and integrated features like a fire pit or outdoor kitchen. Whatever your vision, our design and installation teams collaborate closely with you throughout the planning and construction process.
We believe the best patios reflect both the architecture of your home and the personality of your family. Our approach focuses on creating outdoor spaces that feel like a natural extension of your home—comfortable, functional, and uniquely yours. Our attention to detail during every phase of the project ensures that the final result exceeds expectations in both beauty and durability.
Ready to transform your cracked, uneven patio into an inviting outdoor retreat that you’ll enjoy for decades to come? Contact OutdoorX today for a consultation. Our team serves homeowners throughout Essex County with custom patio design and installation services custom to your property’s unique characteristics and your family’s lifestyle.
Learn more about our professional patio services or call us to schedule a site visit and free estimate. Your dream patio is closer than you think!
