


Replacing Brick Patio: 7 Powerful Tips for Stunning Results 2025
Changing Your Outdoor Space: When to Repair or Replace Your Brick Patio
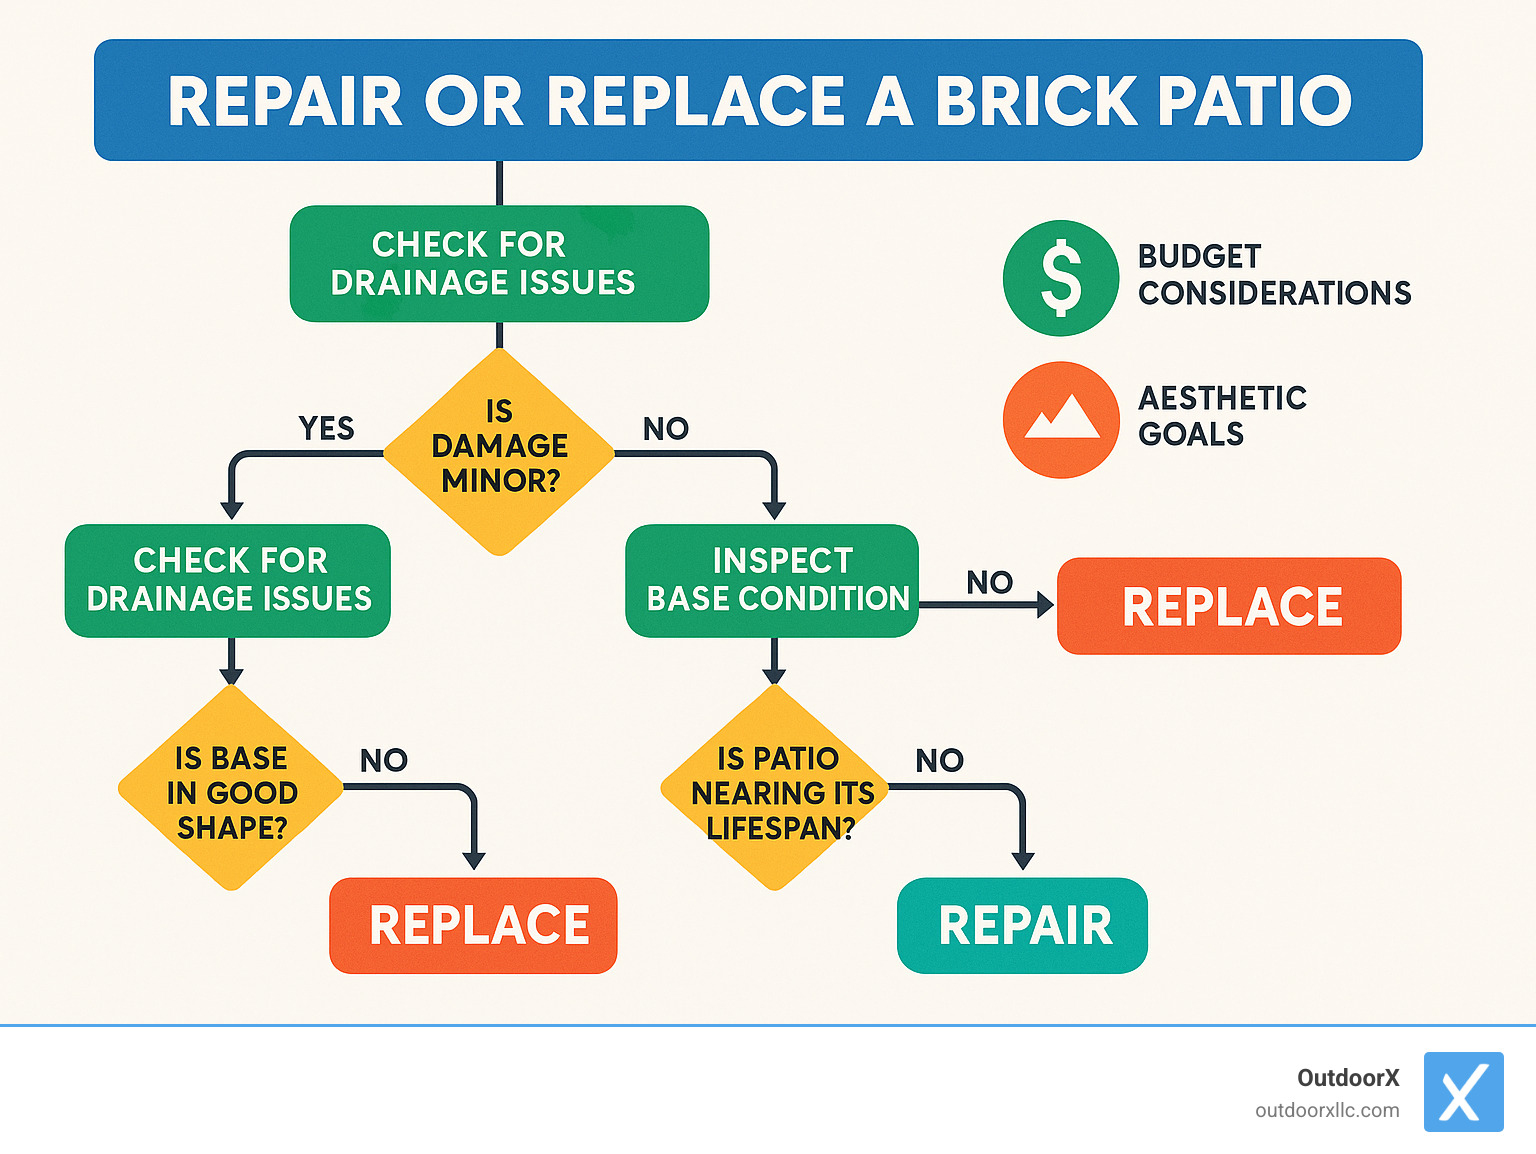
Replacing brick patio surfaces is a significant decision for homeowners looking to revitalize their outdoor living areas. Here’s what you need to know to make an informed choice:
| Quick Decision Guide: Repair vs. Replace |
|---|
| Repair When: |
| • Minor cracks or settling |
| • Only a few damaged bricks |
| • Stable base with good drainage |
| • Joints need repointing |
| • Budget is limited |
When that quaint brick patio that once charmed you starts showing signs of wear and tear, you face an important question: repair the damaged sections or start fresh?
The most likely cause of brick patio deterioration is the freeze/thaw cycle, especially in New England’s harsh winters. Water seeps into cracks, freezes, expands, and gradually destroys your patio’s integrity. As one homeowner noted in our research, “If you live in areas with frigid winters, chances are you’ve experienced cracked or broken patio stones.”
A properly installed brick patio should last for decades with only basic maintenance every 3-5 years. However, if you’re constantly fixing the same areas or noticing widespread settling, it may be more cost-effective to replace the entire surface.
Cost considerations:
– Professional brick patio repair averages $1,200, with smaller jobs starting around $300
– DIY repair of sunken areas can cost under $100 in materials
– Full replacement typically costs between $4-18 per square foot depending on materials chosen
Before deciding, have a professional inspect your patio to assess underlying issues. As many contractors advise, “Spot releveling can exacerbate problems and cause adjacent areas to fail over time.”
For more information about brick patio materials and options, you can visit the Brick Industry Association for technical resources and guidelines on brick installation.
Replacing brick patio terms to learn:
– adding a drain to a concrete patio
– laying landscape pavers
– french drain around patio
Assessing Your Existing Brick Patio: Repair, Restore, or Replace?
Before making any decisions about your brick patio, a thorough assessment is essential. Walking across your outdoor space, you might notice several telltale signs that something’s not quite right underfoot.
Look for cracks in bricks – are they just superficial hairline fractures, or deeper structural breaks? Notice any settled or sunken areas creating uneven surfaces where you might trip after that second glass of wine? How about persistent weeds pushing through despite your best efforts to eliminate them? These uninvited guests often signal deteriorating joints between bricks.
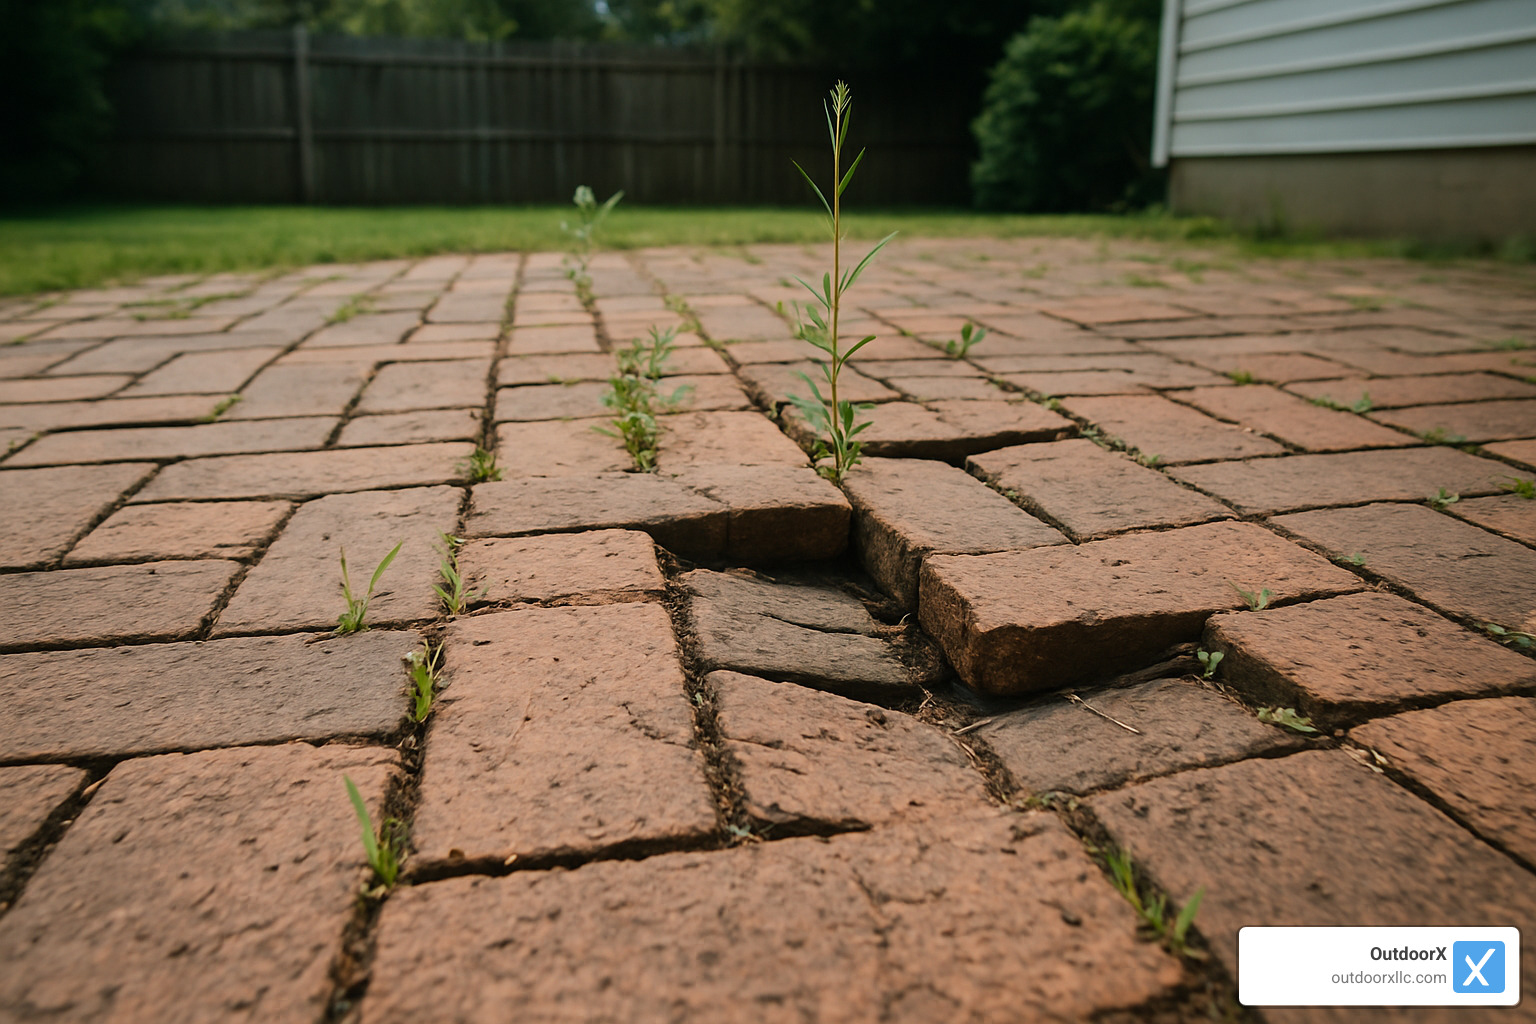
Here in Essex County, Massachusetts, our unique climate creates perfect conditions for patio problems. Those gorgeous New England seasons we love – wet springs, warm summers, and freezing winters – unfortunately form a triple threat to brick surfaces. As many South Hamilton homeowners find, freeze-thaw cycles are particularly destructive. When water seeps into tiny cracks and freezes, it expands with remarkable force – enough to “crush boats and lift buildings,” let alone damage your weekend barbecue spot.
Other warning signs include heaving or popping bricks, water pooling after rain (suggesting drainage issues), and loose or wobbly bricks that shift under your feet, indicating potential base failure underneath.
A quick inspection checklist for your brick patio:
1. Walk the entire surface, noting any movement or unevenness
2. Check for damaged mortar joints between bricks
3. Look for water pooling or drainage issues after rainfall
4. Examine edge restraints for signs of failure
5. Note any significant color changes or brick deterioration
When a Simple Repair Makes Sense
Not every brick patio problem requires demolishing the whole thing. Your wallet will thank you for considering repairs when facing certain situations.
Single brick replacement is surprisingly straightforward if you have matching materials. We recently helped a Hamilton homeowner who had just a few damaged bricks near her grill area – a simple afternoon fix that cost under $100 in materials.
Deteriorating mortar joints with otherwise solid bricks can be restored through repointing rather than complete replacement. Small settled sections with a generally sound base underneath can often be releveled without disrupting the entire patio.
Budget constraints also make repairs attractive. As one homeowner shared, “We pulled up the settled paver bricks, added and compacted a 1½-inch layer of gravel to re-level the base, then relaid the original bricks. The entire repair cost under $100 in materials compared to a $1,500 professional quote.”
For quick DIY brick repairs, you’ll need a crowbar, fresh mortar (Type S or M works best in our New England climate), and either matching mortar or polymeric sand for the joints. Just be sure to clean out the old mortar bed thoroughly before setting your replacement brick.
Red Flags That Mean Full Replacement
Sometimes, your patio is trying to tell you something more serious. Certain issues indicate that repair simply won’t be sufficient or cost-effective long-term.
Widespread heaving or settling affecting more than a quarter of your patio suggests fundamental problems with the entire base. We see this frequently in older South Hamilton homes where patios were installed without proper base preparation.
Recurring problems despite repairs are a clear sign of deeper issues. As one of our clients in Ipswich noted, “I kept repairing the same section of patio every spring, only to find it heaved again the next winter. The OutdoorX team explained that my base was inadequate for our soil conditions, and a complete replacement would actually save money in the long run.”
Water pooling or flowing toward your home isn’t just a patio problem – it’s potentially threatening your foundation. When we see this during assessments, we recommend addressing both the patio and drainage issues simultaneously.
Extensive freeze-thaw damage showing up as spalling (flaking) or cracking across many bricks indicates widespread material failure. Similarly, any structural concerns – particularly if the patio is attached to your home and pulling away – require immediate attention and typically a full replacement approach.
Mismatched bricks from previous repairs not only look unappealing but often indicate a patchwork approach that hasn’t addressed underlying issues. When replacing brick patio surfaces becomes necessary, it’s an opportunity to create a more beautiful, functional space that will last for decades rather than seasons.
The Complete Process of Replacing Brick Patio Surfaces
When you’ve decided that replacing your brick patio is the right choice, understanding the complete process will help you plan appropriately, whether you’re hiring professionals or tackling it as a DIY project.
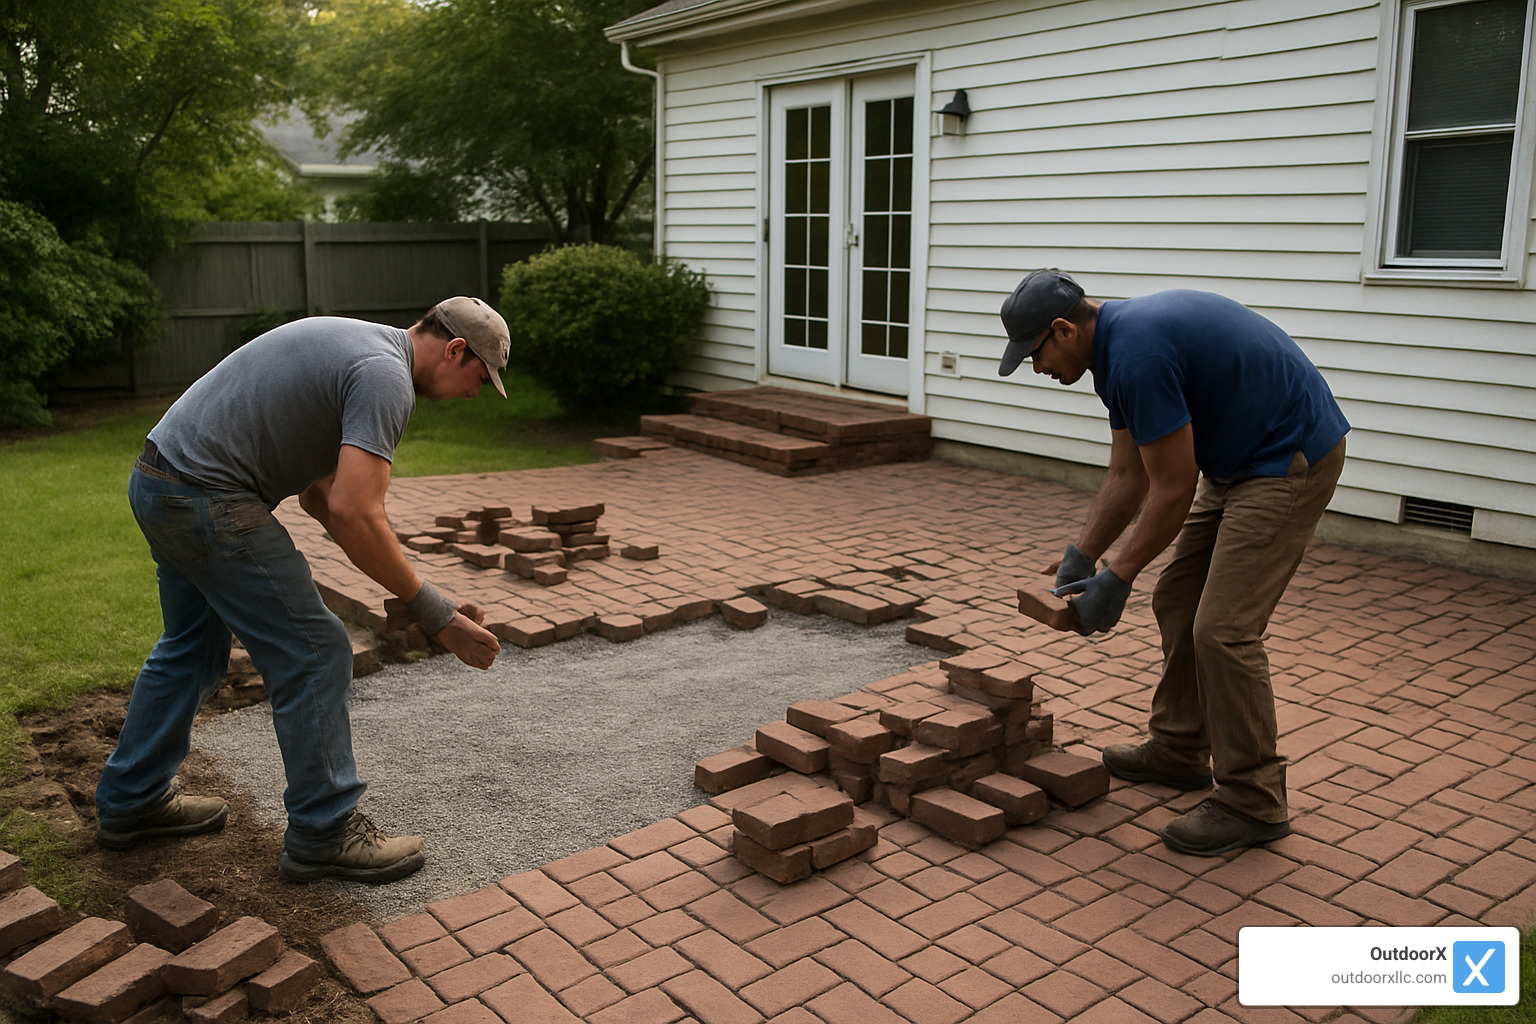
Step-by-Step Guide to Replacing Brick Patio
The journey to a beautiful new brick patio starts with proper planning and ends with careful finishing touches. Most homeowners are surprised by how much goes into the process beyond just laying bricks.
First comes the planning and preparation phase, which typically takes a full day. You’ll need to mark utilities before any digging begins (call 811!), design your layout, calculate materials, and secure any necessary permits—especially important here in Essex County. This is also when you’ll want to rent essential equipment like a plate compactor and masonry saw.
Next is demolition, which can take 1-2 days depending on your patio size. “The demo is where many DIYers realize what they’ve gotten themselves into,” jokes one of our South Hamilton clients who watched our team work. If you’re salvaging bricks, number them with crayon to maintain the pattern. You’ll need to excavate to about 7-8 inches below your desired finished height, making sure to properly dispose of all debris.
The base preparation is truly the foundation of success and typically takes 1-2 days. Grade and compact the soil with a slight slope (¼” per foot) for proper drainage. Then lay landscape fabric to prevent future weed invasion before adding 4-6 inches of crushed gravel in 2-inch layers, thoroughly compacting each layer. As our crew foreman likes to say, “A patio is only as good as what’s underneath it.”
Installing edge restraints usually takes about half a day but is crucial for preventing brick migration over time. Whether you choose plastic, metal, or concrete edging, secure it properly with stakes or concrete backing while ensuring it follows your desired shape.
The sand bed preparation (half-day) involves laying a 1-inch layer of coarse sand, then carefully leveling it using screed rails and a straight board. A light misting helps with compaction without creating mud.
Now comes the exciting part—brick installation (1-2 days). Start from a corner or edge, following your chosen pattern. Place bricks with approximately ⅛” spacing, tapping each one with a rubber mallet to set it firmly. Edge pieces will need cutting with a masonry saw.
Finally, the finishing touches (half-day) bring everything together. Sweep polymeric sand into the joints, then compact the surface with a plate vibrator. Mist with water to activate the polymeric sand, which hardens to help prevent weed growth. Allow 24-48 hours before using your beautiful new patio.
“Laying your own bricks is easy from a planning perspective but physically demanding,” notes one experienced DIYer. “The prep work is 80% of the job, but it’s what makes the difference between a patio that lasts 5 years versus 25 years.”
Materials & Tools Checklist
Replacing brick patio projects require specific materials and tools. For materials, you’ll need paver bricks (calculate square footage plus 10% extra), crushed gravel (¾” size, approximately 4-6″ depth), coarse sand (1″ depth), landscape fabric, edge restraints, polymeric sand for joints, and Type S or M mortar if using the mortar-set method.
Your tool arsenal should include measuring and marking tools (tape measure, string line, stakes), digging and moving equipment (shovel, rake, wheelbarrow), leveling tools (4′ level recommended), installation helpers (rubber mallet, push broom, garden hose with spray nozzle), and specialty equipment you’ll likely rent (plate compactor, masonry saw or brick splitter). Don’t forget safety gear including gloves, eye protection, and a dust mask.
“Always order 10% more materials than calculated,” advises our Marblehead project manager. “The extra cost is minimal compared to the hassle of matching materials later for repairs or if you underestimate.”
Comparing Sand-Set vs Mortar-Set Methods
When replacing brick patios, you’ll need to choose between two primary installation methods, each with distinct advantages:
| Feature | Sand-Set Method | Mortar-Set Method |
|---|---|---|
| Flexibility | Accommodates ground movement | Rigid; may crack with movement |
| DIY Difficulty | Moderate | High (requires masonry skills) |
| Cost | Lower ($4-10/sq ft) | Higher ($10-20/sq ft) |
| Repair Ease | Easy to remove/replace individual bricks | Difficult to repair without damaging adjacent bricks |
| Drainage | Excellent (water permeates joints) | Limited (requires planned drainage) |
| Freeze-Thaw Resistance | Better in cold climates | Can crack in severe frost |
| Longevity | 15-25 years with proper base | 25+ years if properly installed |
| Installation Time | Faster (2-3 days) | Slower (4-7 days) |
For Essex County’s challenging climate, we generally recommend the sand-set method. “Ice expansion is so powerful that it can crush boats and lift buildings,” explains one of our landscape experts. “A sand-set patio with proper polymeric sand allows slight movement during freeze-thaw cycles without structural damage.”
If you do opt for the mortar-set method despite our New England winters, be sure to use Type M mortar for its higher cement content and superior freeze-thaw resistance. This small detail can make a huge difference in longevity.
For more information about hardscaping options beyond brick patios, check out our Hardscaping services page.
Best Practices for Installation: Drainage, Patterns, and Setting Methods
Proper installation techniques are crucial for a long-lasting brick patio. These best practices will help ensure your new patio stands the test of time, especially in our challenging Essex County climate.

The secret to a beautiful brick patio isn’t just what you see on the surface – it’s what lies beneath. In our years of installing patios throughout Essex County, we’ve found that proper drainage and a solid foundation are what separate a patio that lasts decades from one that needs replacing after just a few harsh New England winters.
When planning your patio, always maintain a consistent ¼” per foot slope away from your home. This might sound minor, but for a 10-foot patio, this translates to a 2½” drop from house to outer edge – enough to prevent water from pooling or heading toward your foundation. Use a level and string line during base preparation to ensure this slope remains consistent throughout.
Edge restraints are another critical element that many DIYers overlook. Without proper edging, your beautiful brick pattern will gradually spread outward, creating gaps and unevenness. Plastic edging secured with 10″ spikes every foot works well, but for a more decorative touch, consider a soldier course (bricks set vertically along the perimeter). This not only looks neat but provides excellent structural support.
Ensuring Long-Term Drainage & Stability
Water is your patio’s greatest enemy, especially in Massachusetts where freeze-thaw cycles can wreak havoc. Beyond the basic slope, consider installing a geo-textile fabric under your base layer. This prevents soil from mixing with your gravel base while still allowing water to pass through.
For properties with serious drainage issues, a perforated drain pipe wrapped in fabric at the lowest edge of your patio can be a game-changer. This can connect to existing drainage systems or daylight away from your outdoor living space. One of our clients in Manchester-by-the-Sea had persistent puddles on their previous patio until we installed this simple solution.
Pay special attention to gutter downspout routing as well. Even the best-built patio can be undermined if rainwater from your roof is channeled directly onto it. Direct downspouts away from your patio or consider installing a catch basin to redirect water.
Don’t forget about expansion gaps – leave a ¼” space between your patio and any fixed structures like your house foundation or existing steps. Fill these gaps with flexible masonry caulk to allow for the inevitable seasonal movement without cracking.
Common Mistakes to Avoid When Replacing Brick Patio
Even experienced DIYers can make costly errors when replacing brick patios. The most common mistake we see is inadequate base preparation. Skipping proper compaction or using too thin a gravel layer (less than 4″) might save time initially, but you’ll pay for it later with settling and unevenness.
Another frequent error is using wall bricks instead of paver bricks. They might look similar, but wall bricks absorb more water and are more prone to cracking during freeze-thaw cycles. Proper paver bricks are designed to withstand foot traffic and weather extremes.
Incorrect sand selection can also lead to problems. Never use playground or beach sand – it’s too fine and often contains organic material that can break down. Instead, use coarse, angular sand specifically made for paver bases. For joints, polymeric sand is worth the extra cost as it hardens when wet to lock pavers in place while remaining slightly flexible.
Many homeowners create too steep or inconsistent a slope when leveling their base. While drainage is important, an overly steep patio feels uncomfortable and looks unprofessional. Stick to that ¼” per foot guideline for optimal results.
“The biggest mistake I see is rushing,” explains our lead installer. “Homeowners spend thousands on beautiful bricks but try to save time on the invisible parts – the base and drainage. In our experience from Andover to Rockport, patience during preparation determines whether your patio lasts 5 years or 25.”
Don’t forget the practical matters too – always check for underground utilities before digging and obtain necessary permits from your local building department. South Hamilton and surrounding Essex County towns have specific setback requirements that could affect your patio placement.
A properly installed brick patio isn’t just about aesthetics – it’s about creating a safe, durable outdoor living space that will serve your family for generations. Taking the time to do it right the first time saves money and frustration in the long run.
Budget & Timing: Costs, DIY vs. Pro, Permits
Let’s talk money and time – two things you’ll definitely want to understand before replacing your brick patio. Whether you’re a weekend warrior or prefer to leave it to the experts, knowing what to expect will save you from unwelcome surprises.
Cost Breakdown for Replacing Brick Patio
When budgeting for your patio replacement, consider these typical expenses (based on internet data, not actual OutdoorX pricing):
“The biggest shock for most homeowners isn’t the cost of the pretty bricks on top – it’s everything that goes underneath them,” explains our estimator. “A proper foundation is like insurance for your investment.”
For a typical 100-square-foot patio, expect to pay:
– $800-$2,400 for a DIY project
– $2,000-$6,000 for professional installation
– $5,000-$15,000+ for high-end designs or challenging sites
The materials themselves vary widely in cost. Basic paver bricks might run $0.35-$2 each, while natural stone can command $3-$18 per square foot. Don’t forget the hidden costs: base gravel ($30-$60/ton), sand ($25-$45/ton), landscape fabric ($0.15-$0.45/sq ft), edge restraints ($1-$3/linear foot), and polymeric sand ($10-$30/bag).
Equipment rental adds another layer of expense for DIYers – expect $50-$100 daily for a plate compactor and $50-$150 for a masonry saw, plus delivery fees.
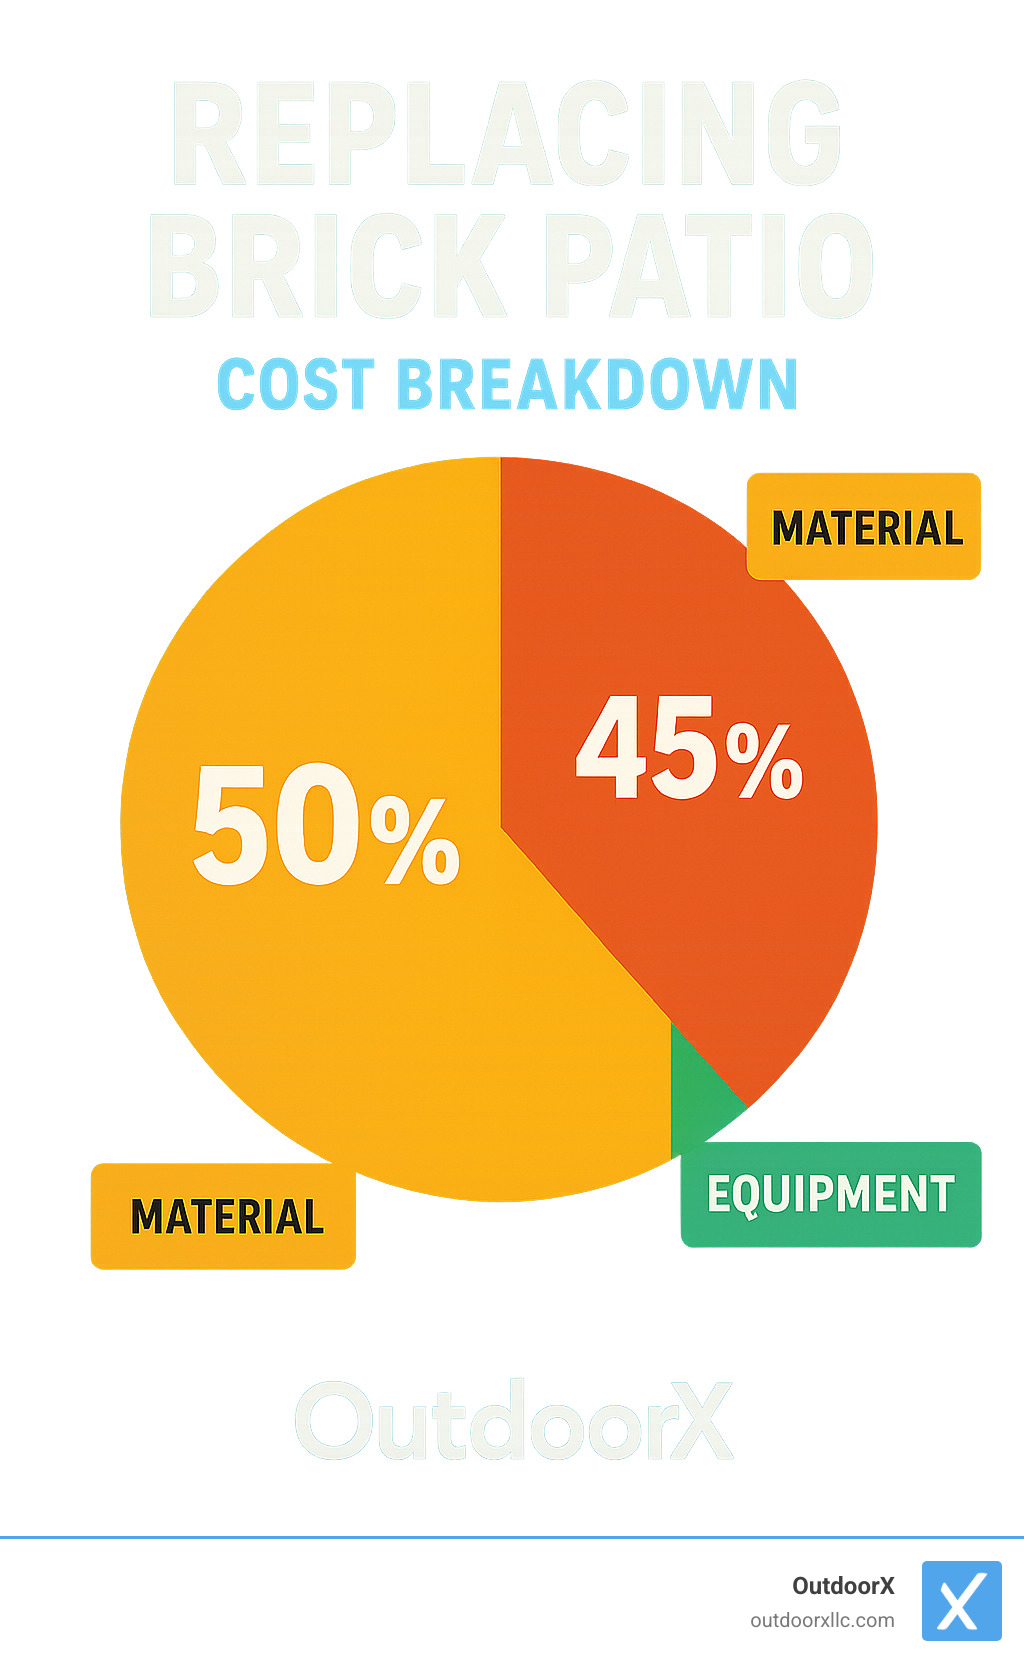
Professional installation typically accounts for 45-60% of your total project cost, but includes expertise, efficiency, and proper disposal of old materials. Speaking of disposal, don’t overlook demolition costs ($2-$6/sq ft) and permit fees ($50-$300 depending on your town).
One Wenham homeowner shared, “I budgeted $3,000 for my patio replacement but didn’t account for the extensive drainage work needed. The final bill was closer to $5,000, but considering my previous patio flooded every spring, it was money well spent.”
DIY or Hire a Pro? Decision Factors
The DIY route can save you 40-60% in costs, but requires honest assessment of your skills, time, and physical ability.
Professional installation brings significant advantages: proper base preparation (the most common DIY mistake), access to commercial-grade equipment, and efficiency – pros can typically complete in 2-3 days what might take you 1-2 weeks. Plus, you’ll get warranty protection and expert knowledge of local codes.
“I started replacing my brick patio myself,” a Newburyport client told us. “After spending an entire weekend just removing old bricks and barely starting excavation, I called OutdoorX. Their team finished in three days what would have taken me three weeks.”
Consider your physical stamina (brick laying is genuinely hard work), technical knowledge of grading and drainage, available time, and project complexity. Straight patterns on level ground are DIY-friendly; curves, multiple levels, and intricate designs often warrant professional help.
Timing matters too – most DIY patio replacements require at least 1-2 full weekends of good weather, while professional crews can typically complete the job in 2-5 days.
Don’t forget permits! In Essex County, most towns require permits for patios over a certain size or those affecting drainage patterns. South Hamilton specifically requires permits for patios exceeding 200 square feet or significantly changing grade. A quick call to your local building department can save headaches later.
As with any major home improvement, build in a 10% contingency for unexpected costs. That beautiful brick patio will be with you for decades – proper planning ensures it’s a source of enjoyment rather than regret.
Long-Term Care, Upgrades, and Common Mistakes to Avoid
A beautifully installed brick patio isn’t just a one-and-done project—it’s an investment that can bring joy for decades with proper care. Let’s explore how to maintain your patio’s beauty and even improve it over time.
Your brick patio will need some regular TLC to stay in top condition. Plan on resealing every 3-5 years to protect against staining and water damage. This is especially important in our Essex County climate, where freeze-thaw cycles can be brutal on masonry. You’ll also want to occasionally top up the polymeric sand in the joints, particularly after the first year when some settling is normal.
During winter, be careful with ice management. Avoid salt-based products as they can damage brick surfaces and mortar. Instead, use sand for traction or calcium magnesium acetate (CMA) products that are gentler on masonry. One of our Ipswich clients shared, “I ruined my first patio with rock salt before I knew better. Now I keep a bucket of sand by the door and haven’t had issues since.”
Small preventative measures make a big difference too. Use furniture pads under heavy items to prevent pressure marks, and consider moving furniture occasionally to ensure even wear patterns. For stubborn stains, a gentle scrub with a soft brush and mild detergent usually does the trick—power washing can damage the surface if used incorrectly.
Improvements That Boost Function & Beauty
Once your brick patio is established, you might want to consider additions that improve its usefulness and charm. Outdoor kitchens have become increasingly popular among our Beverly and Marblehead clients, ranging from simple built-in grills to elaborate cooking stations with refrigerators and pizza ovens.
Shade structures like pergolas not only provide relief from the sun but add architectural interest. “My pergola transformed my patio from a place I could only use in perfect weather to my favorite spot in the house,” reports a happy Hamilton homeowner. We’ve seen lovely installations with climbing vines that create dappled light patterns on brick surfaces.
Retaining walls serve double-duty as both practical grade-changers and built-in seating. When designed thoughtfully, they can define different zones within your outdoor space while providing casual seating for larger gatherings. You can explore more ideas on our retaining walls page.
Smart lighting has revolutionized outdoor spaces in recent years. Low-voltage systems are energy-efficient and can be programmed to create different moods throughout the evening. Subtle pathway lights improve safety while string lights add a magical quality perfect for entertaining.
“Your patio should feel like an extension of your home,” our design team often says. “The goal is to create a space that pulls you outdoors rather than one you merely look at through windows.”
Matching New Bricks to Old Sections
If you’re only replacing part of your brick patio, matching new materials with existing ones requires some detective work. Start by taking close-up photos of your current bricks in natural light, along with precise measurements. Brick dimensions have changed over time, and even slight differences will be noticeable when installed side by side.
Architectural salvage yards can be treasure troves for finding vintage matches. We’ve helped clients in Salem and Ipswich source period-appropriate bricks for their historical homes this way. Manufacturers sometimes keep records of discontinued lines and can suggest the closest current match.
When exact matches aren’t possible, consider a deliberate design approach that makes the transition look intentional rather than like a repair job. Creating a contrasting border between old and new sections can transform what might look like a mismatch into an appealing design feature.
Always do a test layout before committing. “The way bricks look in a pile versus laid out in your specific lighting conditions can be surprisingly different,” notes our materials specialist. “What seemed like a perfect match in the showroom might read differently in your backyard.”
Smart homeowners also store extra bricks whenever they install a new patio. These matching spares become invaluable for small repairs years later when that exact brick style might be discontinued.
Whether you’re maintaining your existing brick patio or dreaming of improvements, thoughtful care and strategic upgrades will extend both the life and enjoyment of your outdoor space for years to come.
Long-Term Care, Upgrades, and Common Mistakes to Avoid
A well-installed brick patio can last for decades with proper maintenance. Here’s how to protect your investment and even improve it over time.
Improvements That Boost Function & Beauty
Once your new brick patio is installed, consider these improvements to maximize its potential:
- Outdoor Kitchen Integration
- Built-in grills and countertops
- Weather-resistant cabinetry
- Pizza ovens or smokers
- Shade Structures
- Pergolas with climbing plants
- Retractable awnings
- Sail shades for flexible coverage
- Water Features
- Small fountains that mask noise
- Bubbling rock features
- Pondless waterfalls
- Lighting Systems
- Low-voltage pathway lights
- Under-bench LED strips
- String lights for ambiance
- Smart lighting systems with programmable settings
- Built-In Elements
- Seating walls that double as planters
- Fire pits or fireplaces
- Storage benches
- Plantings and Containers
- Weather-resistant pottery
- Built-in planters
- Strategic landscaping for privacy
“Your patio should be an extension of your home,” explains our design team. “In Beverly and Marblehead, we’re seeing more clients request integrated features that make their patios usable three seasons of the year.”
For inspiration and more ideas, check out our retaining walls page, which shows how these functional elements can also improve your patio’s beauty.
Matching New Bricks to Old Sections
If you’re only replacing part of your brick patio, matching new materials to existing ones can be challenging but not impossible:
- Salvage Original Bricks When Possible
- Clean and reuse bricks from less visible areas
- Store extras for future repairs
- Finding Matches
- Take clear photos and measurements to suppliers
- Search architectural salvage yards for vintage matches
- Ask manufacturers if your brick style is still produced
- Consider weathering techniques to age new bricks
- Blending Strategies
- Create intentional pattern changes between old and new sections
- Use contrasting border courses to visually separate areas
- Install new bricks in a different pattern to make the change look deliberate
- Testing Before Committing
- Lay out a small section to see how new and old materials look together
- View at different times of day as lighting affects color perception
“When exact matches aren’t possible, we often recommend a design approach that makes the difference look intentional rather than like a patch job,” shares our designer who has worked on numerous historical properties in Salem and Ipswich.
Maintenance Tips for Long-Lasting Results
Your beautiful new brick patio deserves proper care to keep it looking great for years to come. Regular maintenance doesn’t need to be time-consuming, but it does need to be consistent.
Keep it clean by sweeping debris weekly with a standard broom. This simple habit prevents organic matter from decomposing and staining your bricks. Once a year, usually in spring, give your patio a thorough cleaning with a garden hose or low-pressure power washer. High pressure can damage the brick surface and wash out joint sand, so keep it gentle!
Joint maintenance is crucial for preventing weeds and maintaining stability. Every 3-5 years, apply a fresh layer of polymeric sand to keep joints tight and weed-free. As one Hamilton homeowner told us, “I used to spend hours pulling weeds from my patio, but since applying polymeric sand, I barely find any.”
Winter care is especially important in Essex County. Avoid metal snow shovels that can chip and scratch your brick surface – opt for plastic shovels instead. When dealing with ice, skip the salt and use sand for traction. Salt not only damages brick but can harm nearby plants and even affect your home’s foundation. For stubborn ice, calcium magnesium acetate (CMA) is a brick-friendly alternative.
Furniture considerations matter too. Use protective pads under metal furniture to prevent scratching, and consider moving heavy pieces occasionally to prevent uneven wear patterns. One simple trick from our Ipswich customers: “We place small furniture pads under our wrought iron chairs – they cost a few dollars but have saved our patio from countless scratches.”
Annual inspections help catch small problems before they become big ones. Each spring, take a few minutes to check for any bricks that have settled or heaved. Look for damaged edge restraints and address minor issues promptly. As we like to tell our clients, “A stitch in time saves nine – especially with brick patios!”
For more creative ideas to improve your outdoor living space, visit our page on outdoor patio tile ideas for inspiration that complements your new brick patio.
Frequently Asked Questions about Replacing Brick Patio
How long does a full replacement take?
When it comes to timing your replacing brick patio project, planning is everything. A professional team like ours at OutdoorX typically completes a standard 200-300 square foot patio replacement in 3-5 days, weather permitting.
The process unfolds in stages: first, a day for demolition and removal of the old materials (often the most dramatic day of change!). Then we spend 1-2 days on meticulous base preparation, which is truly the foundation of a lasting patio. Finally, 1-2 days are dedicated to the actual brick installation and finishing touches.
DIY enthusiasts should plan for a longer timeline – typically 2-3 weekends for the same size patio. This extended schedule accounts for limited working hours and the learning curve that comes with any new project. Many of our clients have shared stories of DIY projects that began with enthusiasm but ended with a call to our team when they realized the scope of work involved!
In our Essex County climate, we recommend scheduling your patio project between April and October. As one client from Danvers laughed, “I learned the hard way that trying to compact frozen ground in November is like trying to dig through concrete!”
Do I need a permit to replace my patio in MA?
Navigating permit requirements can feel like solving a puzzle, as they vary widely throughout Essex County. Generally speaking:
Most towns require permits for patios exceeding 200 square feet, while patios that alter drainage patterns typically need permits regardless of size. If you live in a historic district, prepare for additional requirements and review processes that protect the area’s character. And if you’re dreaming of adding structures like pergolas or outdoor kitchens to your patio, you’ll almost certainly need permits.
In South Hamilton specifically, requirements can change, so checking with the Building Department is your best first step. You’ll typically need to submit a site plan showing the patio location, dimensions and materials list, and a drainage plan if you’re changing the grade.
“The permit process might seem like a hassle,” our project manager often tells clients, “but it’s much less of a headache than dealing with a stop-work order or finding your unpermitted patio affects your home sale years later.”
We always recommend checking with your local building department before breaking ground on any hardscaping project. Consider it insurance against future complications!
What’s the difference between pavers and traditional bricks?
Though many use the terms interchangeably (even we slip up sometimes!), pavers and traditional bricks have important differences that affect your patio’s longevity.
Paver bricks are specifically manufactured for ground applications with a higher compression strength (typically 8,000+ PSI) and lower water absorption rate (less than 5%). They come in uniform sizes and colors, are available in various shapes and thicknesses, and are typically 2″ thick for pedestrian applications like patios.
Traditional bricks, on the other hand, are designed primarily for walls. They have lower compression strength and higher water absorption, which can lead to cracking during our notorious New England freeze-thaw cycles. They often have holes or frogs (indentations) and are usually 3-4″ thick with less uniformity in size and color.
“One of the biggest mistakes we see in DIY patio projects around Topsfield and Wenham is using wall bricks instead of pavers,” our materials specialist often points out. “It’s like wearing dress shoes to run a marathon – they might look similar to running shoes, but they’re designed for completely different purposes!”
For most patio applications in Massachusetts, we strongly recommend using proper paver bricks or natural stone. The investment in the right materials pays dividends in durability, especially considering our harsh winters where the freeze-thaw cycle can quickly destroy improperly chosen materials.
If you’re unsure about which materials would work best for your specific project, our team is always happy to provide guidance based on your location, usage needs, and aesthetic preferences.
Conclusion
When it comes to replacing your brick patio, you’re not just fixing a surface—you’re reinvesting in your property’s value and creating a space where memories will be made for years to come. Whether you’re grilling with friends on summer evenings or enjoying morning coffee amid fall foliage, a well-built patio becomes the heart of your outdoor living.
At OutdoorX, we’ve seen the change that comes with a properly installed brick patio. Hundreds of homeowners throughout Essex County have trusted us to create outdoor spaces that not only look beautiful but stand up to our challenging New England weather. From the salt-spray conditions along the coast in Manchester-by-the-Sea to the different soil compositions inland in North Reading, we understand that each property presents unique challenges.
What sets our approach apart is our attention to the elements you can’t see—the proper base preparation, strategic drainage solutions, and careful material selection that determine whether your patio will last for five years or twenty-five. As one client from Ipswich told us, “I wish I could show people what’s under my beautiful patio because that’s where the real value is.”
A thoughtfully designed and expertly installed brick patio delivers benefits you’ll appreciate for decades:
Your new patio offers exceptional durability, often lasting 20+ years when properly installed. The classic aesthetic of brick complements nearly any architectural style while requiring minimal maintenance. And should you decide to sell, quality hardscaping typically returns 80-100% of your investment while dramatically improving curb appeal.
Perhaps most importantly, a well-built patio creates flexibility for your future. Today’s simple brick surface can evolve tomorrow with the addition of a pergola, built-in seating, or outdoor kitchen elements—all building upon the solid foundation you’ve established.
Whether you’re ready to break ground tomorrow or just beginning to explore your options, we invite you to learn more about our patio design & installation services. Our team is ready to help transform your outdoor dreams into reality, creating a space that’s beautiful, functional, and built to weather whatever New England throws our way—from summer scorchers to nor’easter blizzards.
After all, your outdoor space shouldn’t just be pretty—it should be pretty amazing.
