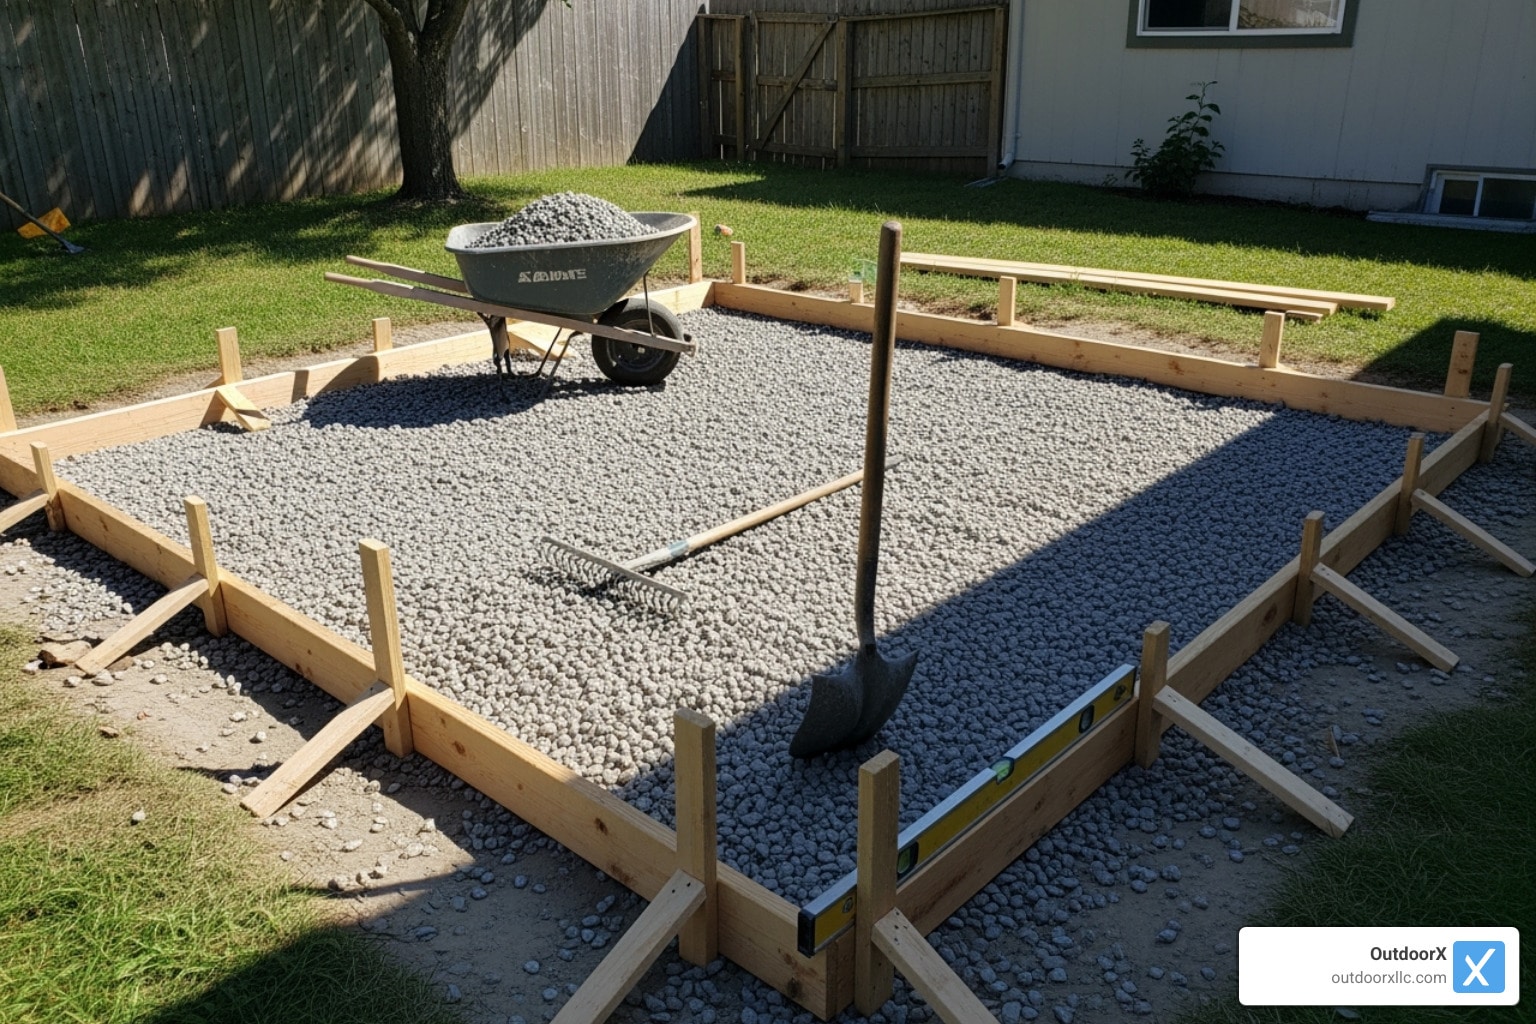
Concrete Patio Installation: 4 Ultimate Flawless Steps
Why Concrete Patio Installation Is the Smart Choice for Your Backyard
A concrete patio installation is a popular, cost-effective way to create a beautiful outdoor living space. It provides a durable, versatile, and affordable area for everything from family barbecues to quiet relaxation.
Quick Overview: Concrete Patio Installation Steps
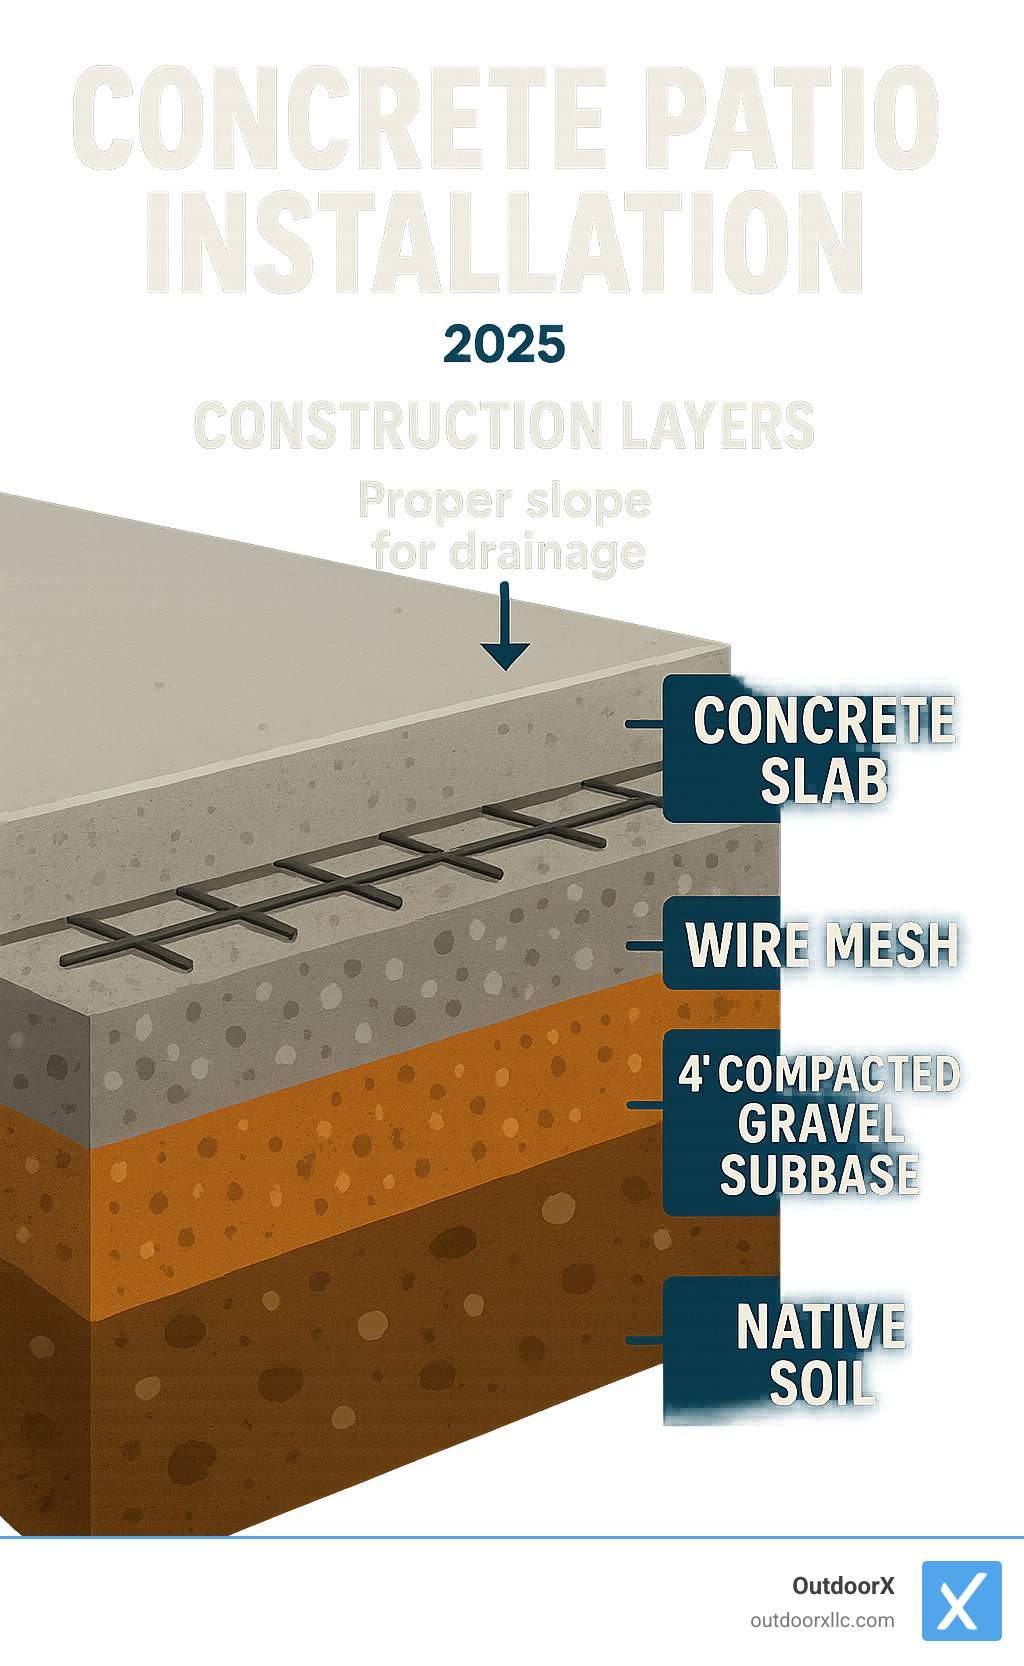
- Plan and prepare – Mark area, excavate 8 inches deep, add 4-inch gravel base.
- Build forms – Use 2×4 lumber, ensure proper slope (1/8″ per foot).
- Add reinforcement – Install wire mesh or rebar for crack prevention.
- Pour concrete – Level with a screed board, float the surface smooth.
- Finish and cure – Apply desired texture, keep moist for 3-7 days.
The typical concrete patio costs $5-$15 per square foot for basic installation, with decorative finishes ranging up to $30+ per square foot. A standard 12×12 foot patio averages around $1,730, making it significantly cheaper than pavers or wood decking.
Key benefits of concrete patios include:
- Durability: Lasts 25-50 years with proper maintenance.
- Low maintenance: Requires just annual cleaning and occasional resealing.
- Versatility: Can be stamped, stained, or textured to match any style.
- Cost-effective: Cheaper than most other patio materials.
While a DIY installation is possible, many homeowners choose professionals to ensure proper drainage, reinforcement, and finishing. Poor installation can lead to cracking and settling, resulting in costly repairs. The process typically takes 2-3 days, plus a week for curing before heavy use.
Related content about concrete patio installation:
Step 1: Planning Your Concrete Patio Project
Successful concrete patio installation begins with careful planning. First, consider how you’ll use the space, as this determines the ideal size and design. For reference, a cozy 12×12 foot patio might cost between $850 to $3,000, while a larger 20×20 foot patio for entertaining could range from $2,400 to $8,000 (based on internet data, not actual OutdoorX LLC pricing).
Site selection is critical. Assess your yard for level ground and easy access for a concrete truck, as these factors impact cost and timeline. Before finalizing plans, check with your local municipality and HOA for rules on dimensions, property line setbacks, and drainage. You can find general information on building codes from resources like the International Code Council.
To calculate your concrete needs, multiply the patio’s length by width by thickness (all in feet) to get cubic footage, then divide by 27 to get cubic yards. A 4-inch thickness is standard. Gather your tools and materials beforehand, including excavation tools, layout tools, 2x4s for forms, leveling equipment, and finishing tools, along with gravel, reinforcement, and concrete mix.
Ensuring Proper Slope and Drainage
Proper drainage is non-negotiable to prevent water damage. A patio must slope away from your house at a rate of 1/4 inch per foot. This gentle, nearly invisible grade ensures rainwater flows away from your foundation. For a 12-foot deep patio, this means a 3-inch total drop. Use stakes and a mason’s line to set this grade accurately. In areas with poor drainage, you may need to consider adding a drain to a concrete patio or other hardscape drainage solutions like trench drains.
Ground Preparation: Excavation and Subbase
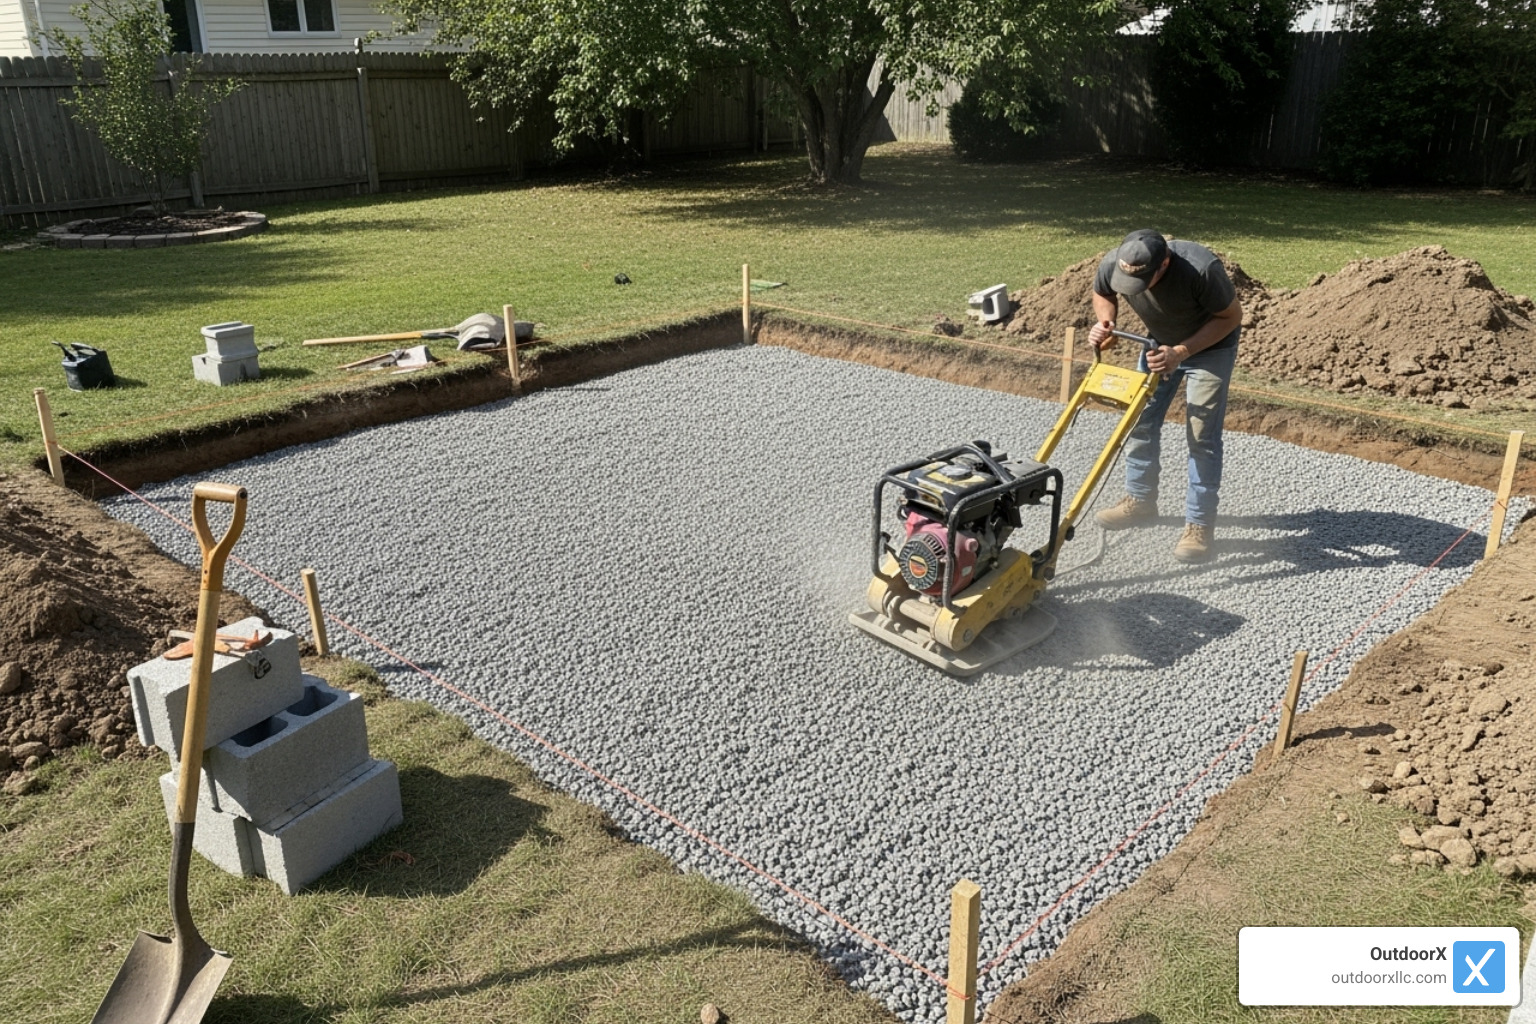
A solid patio needs a solid base. Start by marking your patio area with spray paint, adding extra room around the perimeter to work. Excavate to a depth of 8 inches—4 inches for the gravel subbase and 4 inches for the concrete slab.
After removing sod and topsoil, add a 4-inch layer of compactible gravel. Spread the gravel in 2-inch layers, compacting each one thoroughly with a plate compactor. This compaction step is vital for preventing future settling and cracking. The gravel also provides excellent drainage, keeping water from pooling beneath the slab. Ensure the soil is damp but not waterlogged before you begin.
Step 2: Building Forms and Adding Reinforcement
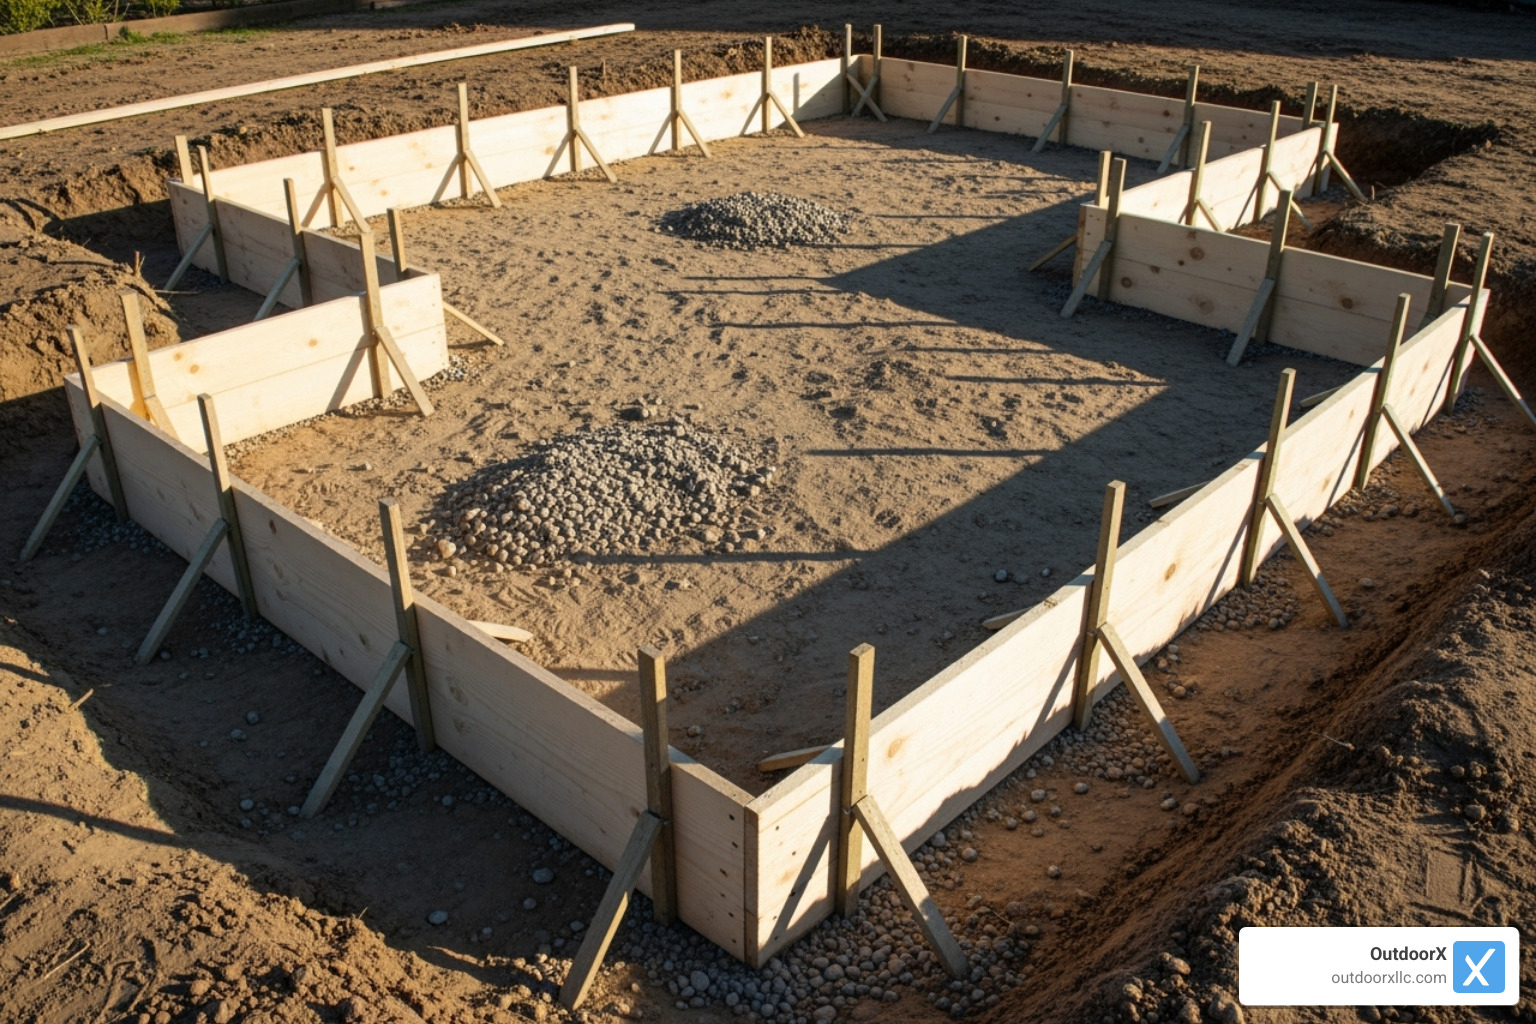
With the ground prepared, the next step in your concrete patio installation is building the forms that will contain the wet concrete. We use 2×4 lumber to create the patio’s outline, securing them with stakes driven into the ground every 2-3 feet. To ensure perfect 90-degree corners, we use the 3-4-5 method: measure 3 feet along one side and 4 feet along the other; the diagonal between these points must be exactly 5 feet.
The tops of the forms must be level and follow the planned drainage slope (1/8 to 1/4 inch per foot), as they will guide the screed board. Before pouring, we apply a release agent to the inside of the forms to prevent the concrete from sticking.
When a new patio meets an existing structure like a house foundation, we install isolation joints. These are 1/2-inch fiber boards that create a buffer, allowing the new and old concrete to move independently and preventing stress cracks.
Reinforcement for Strength
Reinforcement is crucial for preventing cracks and adding tensile strength.
- Wire mesh is the most common choice for residential patios. It should be placed in the middle third of the slab’s thickness, supported by “chairs,” not flat on the ground.
- Rebar (steel reinforcing bars) is used for heavier-duty applications, such as a base for an outdoor kitchen or hot tub. It’s laid out in a grid pattern within the forms.
Proper reinforcement, like a solid subbase, is a key principle of any quality concrete work, including retaining wall concrete design. It ensures your patio can handle ground movement and temperature changes for years to come.
Step 3: Pouring and Finishing Your Concrete Patio
This is the most time-sensitive part of a concrete patio installation. For most patios over 100 square feet, ready-mix delivery is the best option. It arrives perfectly mixed and saves significant time and labor compared to mixing bags yourself.
Once the concrete arrives, work quickly. Pour it into the forms, spreading it evenly with shovels and rakes to fill all corners and eliminate air pockets. Be sure to lift any reinforcement mesh into the middle of the slab as you go.
Next, level the surface by pulling a straight 2×4 (a screed board) across the tops of the forms in a sawing motion. This removes excess concrete and creates a flat plane. After screeding, wait for the “bleed water” on the surface to evaporate. Then, use a bull float to smooth and compact the surface, preparing it for the final finish.

Popular Concrete Finishes and Designs
The finish determines your patio’s final look and texture. Today’s options go far beyond plain gray.
- Broom Finish: A classic, affordable texture created by dragging a broom across the surface. It provides excellent slip resistance. (Avg. cost: $4-$15/sq. ft.)
- Trowel Finish: Creates a very smooth, modern surface. Best for covered areas as it can be slippery when wet.
- Stamped Concrete: Uses mats to press patterns mimicking stone, brick, or wood into the concrete. (Avg. cost: $5-$30+/sq. ft.)
- Exposed Aggregate: The top layer of cement is washed away to reveal the decorative stones within, creating a durable, textured surface. (Avg. cost: $6-$18/sq. ft.)
- Stained or Painted Concrete: Stains create rich, translucent, stone-like tones, while paint offers bold, opaque colors and patterns. (Avg. cost: $5-$20/sq. ft.)
Note: All prices are based on internet data, not actual OutdoorX LLC pricing. The beauty of concrete is its versatility, allowing us to create a custom look for your Essex County home.
Step 4: Curing, Sealing, and Long-Term Care
The final steps of your concrete patio installation are crucial for long-term durability. Concrete doesn’t just dry; it cures through a chemical reaction called hydration, which requires moisture to build strength.
While you can typically walk on the patio in 24-48 hours, it takes a full 28 days to reach maximum strength. During the first week, keep the surface moist. This can be done by covering it with plastic sheeting or spraying it with a liquid curing compound to prevent water from evaporating too quickly.
To manage the inevitable cracking from temperature changes, we cut control joints. These are shallow grooves, typically in a grid pattern every 8-10 feet, that encourage cracks to form in straight, neat lines rather than randomly across the patio.
Sealing and Maintenance
After the patio has cured for a few weeks, applying a good sealer is essential. Sealing provides:
- Water Protection: It creates a barrier that prevents water from soaking into the porous concrete, which is critical for preventing damage from freeze-thaw cycles in Essex County.
- Stain Prevention: It makes cleaning up spills from barbecues or yard work much easier, as they sit on the surface instead of soaking in.
- Improved Appearance: Many sealers deepen the color and add a slight sheen.
We recommend reapplying a sealer every 2-3 years. With proper care—including regular sweeping and periodic resealing—a concrete patio has an average lifespan of 25 to 50 years. Simple landscaping maintenance, like keeping soil and mulch away from the patio’s edge, also helps extend its life.
Your Complete Guide to Concrete Patio Installation Costs
Understanding the investment is key, and concrete patio installation is one of the most budget-friendly hardscaping options.
Please note: The prices discussed here are national averages based on internet data and not actual pricing for OutdoorX LLC. For a precise quote for your project in Essex County, please contact us for your patio design & installation project.
Nationally, a typical concrete patio installation ranges from $2,200 to $7,000, with the final cost depending on several factors:
- Size and Shape: Larger, simpler shapes are more cost-effective per square foot than smaller, complex designs with curves.
- Finish: A basic broom finish is the most affordable ($4-$12/sq. ft.), while decorative options like stamped concrete ($5-$30+/sq. ft.) or exposed aggregate ($6-$20/sq. ft.) increase the price.
- Site Conditions: Difficult access, significant grading, or removal of old concrete ($2-$6/sq. ft.) will add to the total cost.
DIY vs. Professional Concrete Patio Installation
A DIY installation can save 40-50% on labor costs but requires intermediate skill, physical labor, and working under a tight deadline. Mistakes in preparation or finishing can lead to cracks and drainage issues that are expensive to fix.
Professional installation ensures a high-quality finish, proper drainage, and long-term durability. Experts handle site challenges efficiently, saving you time and providing peace of mind that the job is done right, maximizing the 25 to 50-year lifespan of your investment.
Cost Comparison: Concrete vs. Other Materials
Concrete offers excellent value compared to other materials. Beyond the initial installation cost, consider long-term maintenance. A concrete patio requires minimal upkeep, while wood decks need frequent staining and pavers can shift or grow weeds. Replacing a deck with a patio is often a smart long-term financial decision.
| Material Type | Average Cost Per Square Foot | Notes |
|---|---|---|
| Concrete Patio | $5-$30+ | Most versatile and cost-effective; wide range of decorative options |
| Pavers | $8-$25 | Higher installation costs; can shift over time |
| Natural Stone | $15-$50 | Beautiful but expensive; requires skilled installation |
| Wood Decking | $15-$50 | Requires ongoing maintenance; shorter lifespan |
| Stamped Concrete | $12-$40 | Mimics expensive materials at a fraction of the cost |