How To Do Spring Yard Cleanup: 10 Powerful Tips for 2025
Why Spring Yard Cleanup Sets the Stage for Year-Round Success
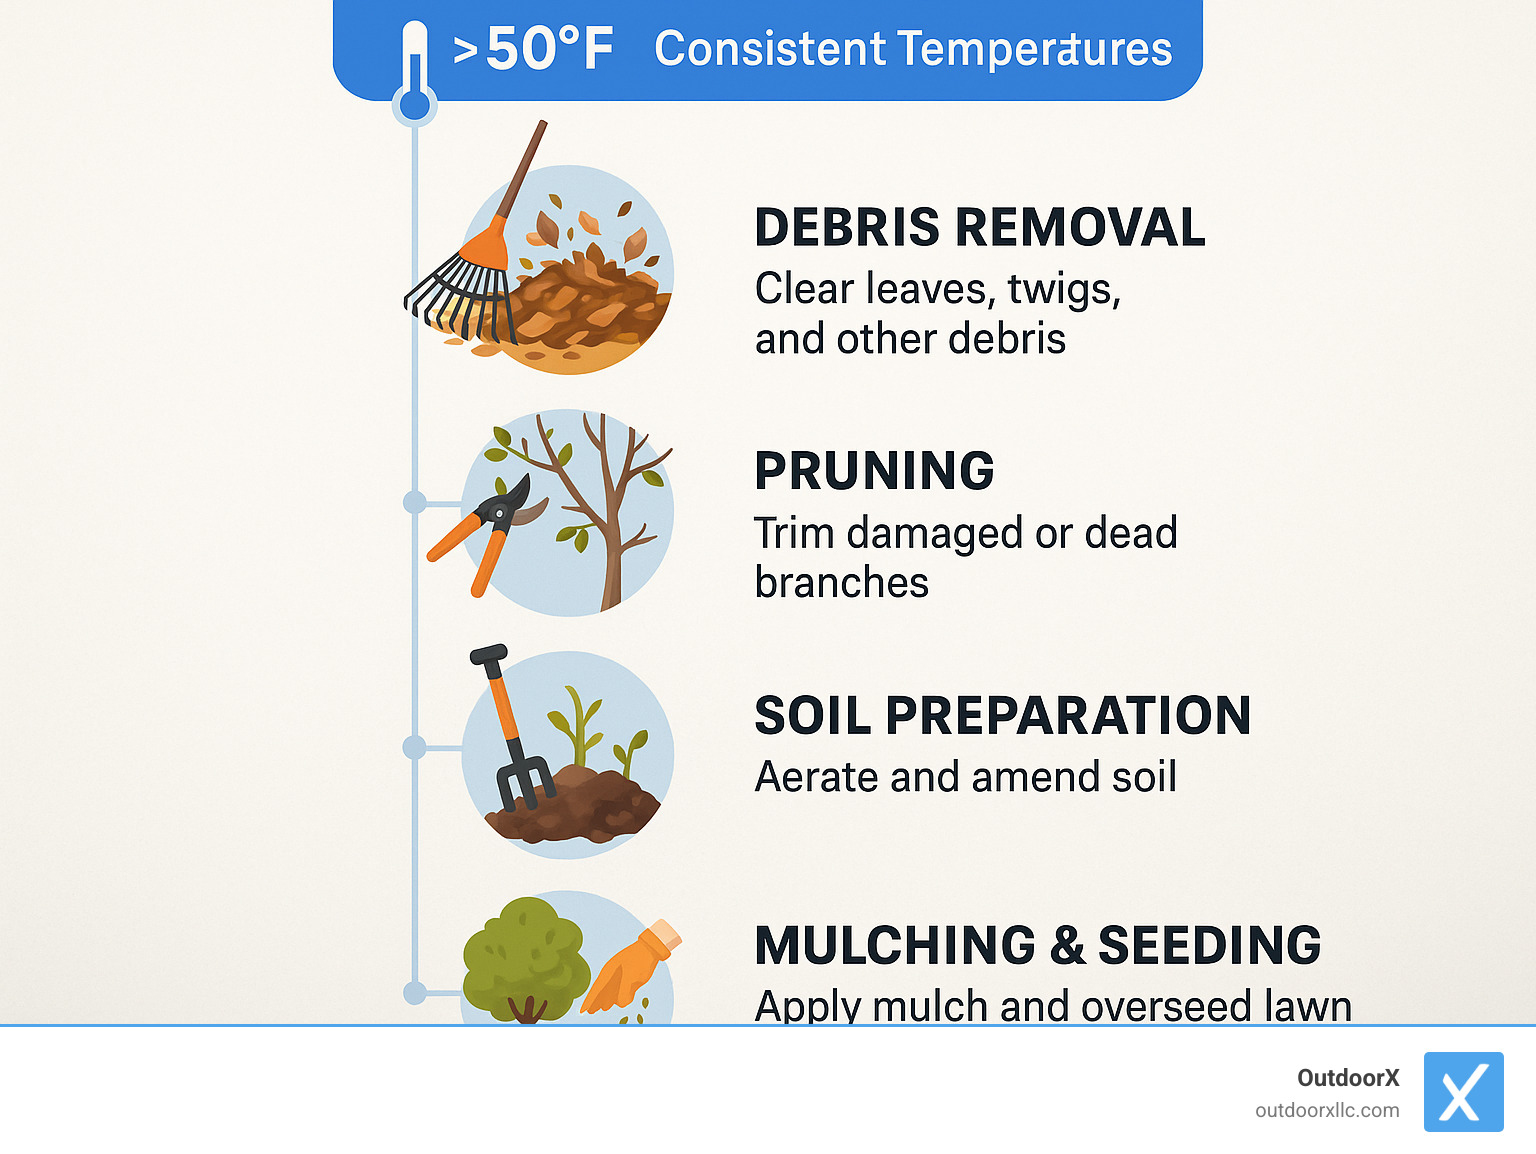
Learning how to do spring yard cleanup properly transforms your outdoor space from winter’s aftermath into a thriving landscape ready for the growing season. The key steps include: removing debris, pruning damaged branches, aerating compacted soil, applying fresh mulch, and timing these tasks when temperatures consistently stay above 50°F.
Spring cleanup isn’t just about aesthetics – it’s about creating the foundation for a healthy, vibrant yard that requires less maintenance throughout the year. After months of winter weather, your landscape needs strategic attention to remove accumulated debris, revive struggling plants, and prepare soil for optimal growing conditions.
The timing matters more than you might think. Research shows that waiting until temperatures consistently exceed 50°F (10°C) for several days protects overwintering pollinators and beneficial insects that shelter in plant debris and leaf litter. Many homeowners rush into cleanup too early, potentially harming the very creatures that keep their gardens healthy.
Your spring cleanup checklist should balance three priorities:
- Plant health – removing diseased material and promoting new growth
- Soil preparation – aerating, composting, and creating optimal growing conditions
- Ecosystem support – protecting beneficial insects while maintaining a tidy appearance
Whether you tackle the work yourself or hire professionals, understanding the proper sequence and timing ensures your outdoor space thrives with minimal intervention later in the season. The effort you invest now pays dividends in reduced maintenance, healthier plants, and a more beautiful landscape throughout the year.
Easy how to do spring yard cleanup glossary:
Best Time to Kick Off Your Spring Yard Cleanup
The golden rule for spring cleanup timing is simple: wait until daytime temperatures consistently stay above 50°F (10°C) for at least seven consecutive days. This temperature threshold protects overwintering pollinators and beneficial insects that shelter in plant debris throughout the winter months.
Nature provides its own timing cues that are more reliable than calendar dates. When forsythia begins blooming in your area, soil temperatures have typically reached the optimal range for grass seed germination and safe cleanup activities. This natural indicator works better than arbitrary dates because it reflects actual growing conditions in your specific location.
Soil conditions matter as much as air temperature. Before starting any cleanup work, ensure your soil has thawed completely and excess water has drained away. Working on waterlogged or frozen soil can cause compaction damage that takes months to repair. Test soil readiness by pressing your foot into the ground – if it leaves a deep impression or water pools around your shoe, wait a few more days.
The pollinator protection principle has transformed how we approach spring cleanup. Latest research on delaying cleanup for insects shows that 70% of native bees nest in the ground, while many beneficial insects overwinter in hollow plant stems and leaf litter. Adult butterflies like Mourning Cloaks, Question Marks, and Commas survive winter by hiding in garden debris, emerging only when temperatures warm consistently.
Timing Tips for How to Do Spring Yard Cleanup in Different Regions
Your USDA hardiness zone determines the optimal cleanup window, but microclimates within your property can vary significantly. Areas that receive full sun and have good drainage will be ready for cleanup weeks before shaded, low-lying spots.
For northern regions (zones 3-5): Start cleanup activities in late April to early May, watching for soil thaw and consistent temperatures above 50°F. These areas often experience late frosts that can damage newly exposed plants.
For temperate zones (6-7): Mid to late March typically provides the right conditions, but watch for sudden cold snaps that can stress plants if protective debris is removed too early.
For warmer areas (zones 8-9): Early March cleanup is often possible, but even these regions benefit from waiting until beneficial insects have emerged from winter shelter.
Use technology to your advantage – soil thermometer apps and local extension service charts provide real-time data about ground conditions. Many extension offices offer frost date predictions and soil temperature monitoring that takes the guesswork out of timing decisions.
Step-by-Step: How to Do Spring Yard Cleanup Like a Pro
Mastering how to do spring yard cleanup requires following a logical sequence that maximizes efficiency while protecting your landscape’s health. We’ve refined this process through years of experience helping homeowners throughout Essex County transform their outdoor spaces.
The professional approach follows this order:
- Remove winter debris and assess damage
- Prune trees, shrubs, and perennials strategically
- Prepare and amend soil in garden beds
- Apply fresh mulch and compost
- Address lawn needs through aeration and overseeding
- Establish weed control and fertilization programs
This sequence prevents you from damaging newly planted areas or creating extra work by disturbing freshly mulched beds. Each step builds on the previous one, creating a comprehensive change that sets your landscape up for success.
More info about spring services
Remove Winter Debris Safely
Winter debris removal goes beyond simple aesthetics – it’s about preventing disease, pest problems, and creating space for new growth. Start by walking your entire property with heavy work gloves and a wheelbarrow, systematically collecting debris that could harbor problems.
Prioritize safety during debris removal. Broken glass, sharp metal, and damaged branches pose real hazards. Use a methodical approach, working from the house outward, and never rush through areas with limited visibility. Pet waste removal is equally important – accumulated waste creates nitrogen burn spots and attracts pests.
The proper raking technique makes a significant difference in efficiency and plant protection. Use a flexible-tine rake for delicate areas around emerging perennials, switching to a rigid rake for open lawn areas. Rake when grass and plants are dry to prevent tearing roots and spreading fungal diseases.
Fallen branches require special attention. Remove all deadwood, but inspect larger branches for signs of disease or pest damage before composting. Diseased material should go to municipal collection rather than your compost pile to prevent spreading problems throughout your landscape.
Prune Trees, Shrubs & Perennials
Strategic pruning during spring cleanup promotes healthy growth while removing winter damage. The key is understanding which plants to prune when, as timing affects flowering and overall plant health.
Dead wood removal is always appropriate regardless of season. Remove branches that show no signs of life, display disease symptoms, or create safety hazards. Make clean cuts just outside the branch collar to promote proper healing.
Flowering shrubs require timing precision. Spring-blooming shrubs like forsythia, lilac, and azalea should be pruned immediately after flowering to avoid removing next year’s buds. Summer-blooming shrubs can be pruned in late winter or early spring before new growth begins.
The 8-inch stem stubble rule benefits both plant health and beneficial insects. When cutting back perennials, leave 8 inches of stem above ground. This height provides nesting sites for native bees while protecting the plant’s crown from late frost damage.
Proper pruning tools make the difference. Use clean, sharp hand pruners for stems up to ¾ inch diameter, loppers for branches up to 2 inches, and a pruning saw for larger cuts. Clean tools between plants with rubbing alcohol to prevent disease transmission.
More info about landscape maintenance
Protect Pollinators While Cleaning Up
Modern spring cleanup balances aesthetic goals with ecological responsibility. Spring garden clean up done RIGHT emphasizes simple modifications to traditional cleanup methods that can dramatically improve habitat for beneficial insects without compromising your landscape’s appearance.
Ground-nesting bees emerge throughout spring as soil temperatures warm. Delay mulch application until you observe bee activity in your yard, typically when you see small holes appearing in bare soil areas. These native bees are excellent pollinators and pose no threat to humans.
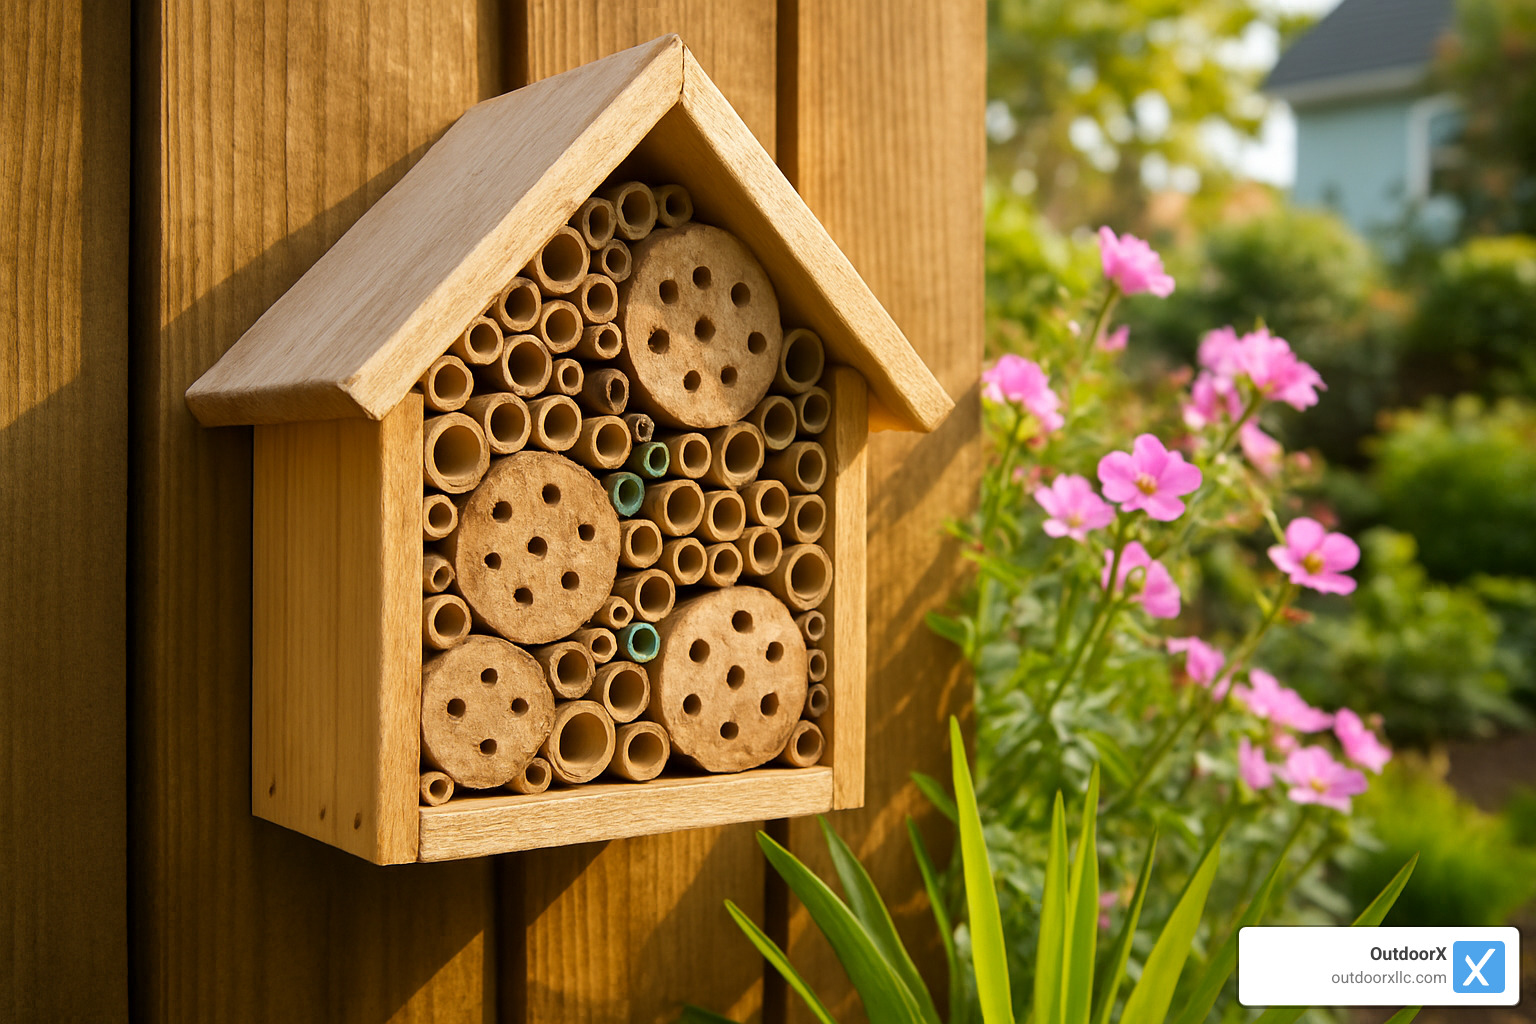
Create insect hotels from pruned stems. Bundle hollow stems like joe-pye weed, ironweed, and sunflower stalks with twine and hang them from fences or trees. These bundles provide nesting sites for mason bees and other beneficial insects throughout the growing season.
Delayed mulch application serves multiple purposes. Waiting until soil warms allows ground-dwelling insects to emerge while preventing mulch from trapping moisture against plant crowns. Apply mulch when daytime temperatures consistently exceed 60°F for best results.
The chop-and-drop method works well for areas not visible from main viewing points. Instead of removing all plant debris, chop it into smaller pieces and leave it to decompose naturally. This approach feeds soil organisms while providing continued habitat for beneficial insects.
Refresh Flower Beds & Mulch
Fresh mulch and soil amendments transform tired flower beds into vibrant growing spaces. The key is preparing beds properly before adding new materials, ensuring optimal growing conditions for the season ahead.
Compost topdressing provides gentle nutrition that won’t burn plants like synthetic fertilizers can. Apply a ½-inch layer of quality compost around existing plants, working it lightly into the soil surface without disturbing roots.
The 2-3 inch mulch rule suppresses weeds while conserving moisture. Apply organic mulch like shredded hardwood, pine straw, or composted leaves, keeping it 2-3 inches away from plant stems to prevent rot and pest problems.
Organic fertilizer timing depends on soil temperature and plant emergence. Apply slow-release organic fertilizers when forsythia blooms, as soil temperatures are optimal for nutrient uptake. Bone meal and blood meal work well for spring feeding programs.
Bed edging creates definition while preventing grass encroachment. Use a half-moon edger or sharp spade to create clean lines between lawn and garden areas. This simple step dramatically improves your landscape’s professional appearance.
Lawn Revival—Aerate, Reseed, Fertilize
Spring lawn care sets the foundation for a healthy, resilient turf that withstands summer stress. The combination of aeration, overseeding, and proper fertilization creates optimal growing conditions for grass recovery and establishment.
Core aeration relieves soil compaction that accumulates over winter from foot traffic and equipment use. Rent a core aerator for lawns over 1,000 square feet, or use a manual aerator for smaller areas. Aerate when soil is slightly moist but not waterlogged.
The ½-inch compost layer technique improves soil structure and provides slow-release nutrition. After aerating, spread a thin layer of quality compost across the lawn, working it into aeration holes with a flexible rake.
Crabgrass pre-emergent timing is critical for effective weed control. Apply pre-emergent herbicide when soil temperatures reach 55°F, typically when forsythia begins blooming. This timing prevents crabgrass seeds from germinating without harming existing grass.
Overseed cool-season grasses in early spring for best establishment. Choose seed varieties suited to your specific conditions – sun/shade tolerance, traffic tolerance, and local climate adaptation. Keep seeded areas consistently moist until germination occurs.
Compost Yard Waste Correctly
Proper composting transforms yard waste into valuable soil amendment while reducing disposal costs. Understanding the basic principles ensures successful decomposition and usable compost for next season.
The brown-green ratio is fundamental to successful composting. Aim for 3 parts brown materials (dried leaves, paper, cardboard) to 1 part green materials (fresh grass clippings, kitchen scraps, fresh plant trimmings). This ratio provides optimal carbon-to-nitrogen balance for decomposition.
Moisture like a wrung-out sponge describes the ideal compost moisture level. Too dry and decomposition slows; too wet and the pile becomes anaerobic and smelly. Add water during dry periods and brown materials if the pile becomes too soggy.
Turn every 2 weeks to maintain aeration and speed decomposition. Use a pitchfork or compost fork to move materials from the outside to the center, ensuring even decomposition throughout the pile. Proper turning produces finished compost in 3-6 months.
Avoid composting diseased materials or weeds that have gone to seed. These materials can spread problems throughout your landscape when you apply the finished compost. Send problematic materials to municipal collection instead.
Common Mistakes When Learning How to Do Spring Yard Cleanup
Even experienced gardeners make mistakes that can set back their landscape’s progress. Understanding these common pitfalls helps you avoid problems and achieve better results from your cleanup efforts.
Over-mulching suffocates plants and creates pest habitat. More isn’t always better – stick to the 2-3 inch rule and keep mulch away from plant stems. Excessive mulch also prevents beneficial insects from accessing soil for nesting.
Pruning spring bloomers too early removes flower buds and eliminates the current year’s display. Wait until after flowering to prune forsythia, lilac, and other spring-blooming shrubs. Summer bloomers can be pruned in late winter or early spring.
Mowing wet grass creates multiple problems including disease spread, soil compaction, and poor cut quality. Wait until grass blades are dry to the touch before mowing. Wet conditions also make cleanup work more difficult and less effective.
Starting cleanup too early harms beneficial insects and can damage plants if late frosts occur. Patience pays off – waiting for proper conditions ensures better results and supports ecosystem health.
Sustainable & Pollinator-Friendly Strategies
Modern landscaping accepts sustainability while maintaining beauty and functionality. These strategies reduce environmental impact while creating healthier, more resilient outdoor spaces that support local wildlife.
Leave leaves in less visible areas to provide ongoing habitat for beneficial insects. Rake leaves from lawn areas and high-visibility beds, but leave them under shrubs and in naturalized areas where they decompose naturally and feed soil organisms.
Chop-and-drop methodology works well for perennial beds and shrub borders. Instead of removing all plant debris, chop it into smaller pieces and leave it to decompose in place. This approach reduces waste while providing continuous soil improvement.
Native plant integration during cleanup creates long-term sustainability benefits. Replace struggling non-native plants with species adapted to local conditions. Native plants require less water, fertilizer, and pest control while supporting local wildlife populations.
Chemical-free herbicide alternatives include corn gluten meal for pre-emergent weed control and vinegar-based solutions for spot treatment of existing weeds. These options are safer for beneficial insects and soil organisms while still providing effective weed management.
Rainwater collection during spring cleanup preparation reduces irrigation needs throughout the growing season. Install rain barrels or create simple collection systems to capture water for dry periods. This approach reduces municipal water usage while providing plants with naturally soft water.
Essential Tools, Safety Gear & Cost Snapshot

Having the right tools makes spring cleanup safer, more efficient, and more enjoyable. Quality tools last for years and make the difference between struggling through tasks and completing them professionally.
Hand pruners are the most important tool for precision work around plants. Choose bypass pruners for living wood and anvil pruners for dead material. Keep blades sharp and clean to prevent disease transmission and ensure clean cuts that heal properly.
Mulching mowers eliminate the need to bag grass clippings while providing natural fertilization. The chopped clippings decompose quickly and return nutrients to the soil. This approach saves time and reduces waste while improving lawn health.
Compost forks are essential for turning compost piles and moving organic materials. The tines penetrate materials easily while allowing fine particles to fall through. A quality compost fork makes managing organic waste much more efficient.
Safety gear protects against common hazards encountered during cleanup work. Heavy work gloves prevent cuts and splinters, safety glasses protect eyes from flying debris, and knee pads make ground-level work more comfortable. Steel-toed boots provide protection when moving heavy materials.
Soil thermometers take the guesswork out of timing decisions. Digital models provide accurate readings that help determine when soil conditions are optimal for seeding, planting, and other temperature-sensitive activities.
Cost considerations for spring cleanup vary widely based on property size and scope of work. Based on internet data, basic cleanup services range from $200-$800 for average properties, with large properties potentially reaching $2,500 or more. These are average costs and not actual OutdoorX pricing. DIY cleanup costs typically range from $50-$300 for tools and materials, depending on what you already own.
Hardscape, Patios & Fences: Don’t Forget the Details
Spring cleanup extends beyond plants and soil to include hardscape elements that frame your outdoor space. These details make a significant difference in your landscape’s overall appearance and functionality.
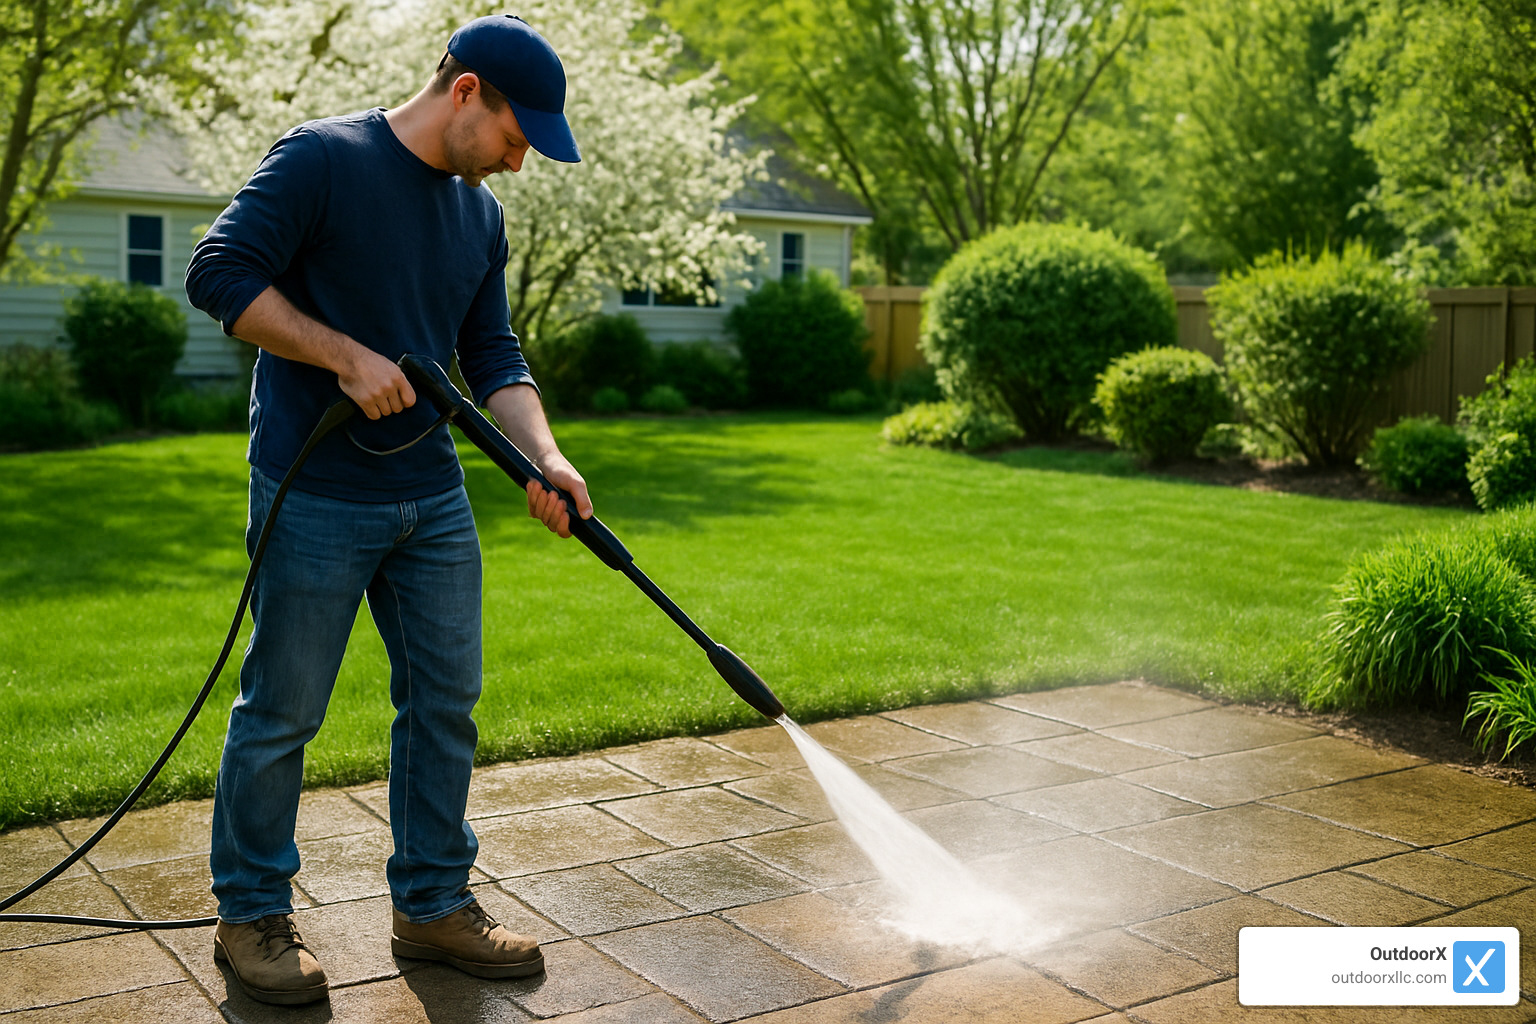
Pressure washing paths and patios removes winter grime, mold, and algae buildup that can create slippery conditions. Use appropriate pressure settings for different materials – lower pressure for wood decking and higher pressure for concrete surfaces. Always test in an inconspicuous area first.
Reset heaved pavers that have shifted due to freeze-thaw cycles. Remove affected pavers, re-level the base material, and reinstall with proper spacing. This maintenance prevents further damage and maintains safe walking surfaces.
Gravel path maintenance involves raking to redistribute materials and adding fresh gravel where needed. Edge paths cleanly to prevent gravel from migrating into lawn areas. Well-maintained gravel paths provide excellent drainage and attractive transitions between landscape areas.
Fence repair should address winter damage before it worsens. Replace rotted boards, tighten loose hardware, and treat wood surfaces with appropriate sealers. Clean wooden fences with a mild bleach solution before applying new stain or paint.
Deck sealant application protects wood surfaces from moisture damage and UV degradation. Spring is ideal for this work as temperatures are moderate and humidity levels are typically lower than summer conditions. Proper preparation and application ensure maximum protection.
More info about landscape design build
Frequently Asked Questions About Spring Yard Cleanup
When and how should I divide and transplant perennials?
Divide perennials in early spring when shoots are 2-3 inches tall and soil is workable. Dig up the entire clump and use a sharp spade or knife to separate it into sections with at least 3-4 healthy shoots each. Replant divisions immediately at the same depth they were growing previously, water thoroughly, and apply a light layer of compost around the new plantings.
The best candidates for division are perennials that have been in place for 3-5 years and show signs of declining vigor or overcrowding. Popular plants like hostas, daylilies, and ornamental grasses respond well to spring division and often produce more vigorous growth and better flowering.
Is spring a good time to fertilize my lawn and garden?
Spring fertilization timing depends on your specific plants and local conditions. For cool-season grasses, apply fertilizer when forsythia blooms and soil temperatures reach 55°F. This timing ensures nutrients are available when grass begins active growth.
Garden beds benefit from slow-release organic fertilizers applied when soil can be worked easily. Compost provides gentle nutrition without risk of burning plants, while synthetic fertilizers should be applied according to package directions and watered in thoroughly. Avoid fertilizing during dry conditions or when plants are stressed.
What tools do I really need for a basic spring cleanup?
Essential tools for basic spring cleanup include: quality hand pruners for precision cutting, a flexible-tine rake for delicate areas, a rigid rake for lawn work, heavy work gloves for protection, and a wheelbarrow or garden cart for moving materials.
Additional helpful tools include: a half-moon edger for creating clean bed lines, a compost fork for managing organic materials, and a soil thermometer for timing decisions. Start with the essentials and add specialized tools as your experience and needs grow.
Conclusion
Learning how to do spring yard cleanup properly transforms your outdoor space into a thriving landscape that requires less maintenance throughout the growing season. The key principles – proper timing, systematic approach, and ecological awareness – ensure your efforts support both plant health and beneficial wildlife.
At OutdoorX, we understand that spring cleanup is more than just removing winter debris. It’s about creating the foundation for a beautiful, functional outdoor space that reflects your preferences while supporting local ecosystems. Our experience throughout Essex County has taught us that the most successful cleanups balance aesthetic goals with environmental responsibility.
The season-ready yard you create through proper spring cleanup provides months of enjoyment with minimal ongoing maintenance. By following these techniques and timing guidelines, you’ll establish healthy growing conditions that support vibrant plants, beneficial insects, and beautiful outdoor living spaces.
Our eco-friendly approach to spring cleanup reflects modern understanding of landscape ecology while maintaining the high standards our clients expect. Whether you tackle the work yourself or partner with professionals, these techniques ensure your outdoor space thrives throughout the growing season.
Spring cleanup is an investment in your property’s long-term health and beauty. The time and effort you invest now pays dividends in reduced maintenance, healthier plants, and a more enjoyable outdoor environment for years to come.
More info about landscape installation
